
 |
| Fig. 1 These are the best-fitting 80s clothes I've seen in a couple decades. |
 |
| Fig. 2. Fitting would be so much easier if I had one of these. |
Actually, first, I needed to determine what size to trace. P-P recommends using the upper bust measurement to determine your size which I did even though it seemed like pure folly to trace out a size 8 when I know I wear a 12 or 14 in RTW. But hey, they're the fit experts, so I traced out the 8 and did the tissue-fitting.
As a result of that fitting, I made the following adjustments:
- Broad Back
- Full Bust
- Swayback
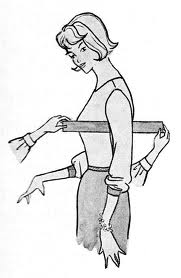 |
| Fig. 3. Fitting would also be easier with an extra pair of hands. |
Anyway, I made the alterations to the tissue, tried on the tissue again, then traced it onto a clean piece of tissue because the original had just about had it. Then, I did a muslin.
Now, the P-P method does not have you do a muslin. They have you tissue-fit and then "fit as you sew," meaning that you cut your garment out of the (potentially expensive) fashion fabric, pin it together, fine-tune the adjustments, and then sew. Well. This seemed a little too cavalier for me. I mean, I realize that, from their perspective, if you did the tissue-fitting properly, there shouldn't be too much for you to have to fix at this stage. But, seeing as how this was the first time I'd done most of these adjustments, I wasn't at all sure I had done the tissue-fitting properly. So, I used some inexpensive cotton broadcloth to make a muslin that I then pinned together and tried on.*
Right away, I could see there were some issues. One was that the bust darts were a little too low and weren't pointing at my apex. Frankly, considering the HUGE FBA I did, I was amazed that they were as close as they were. But, close wasn't going to cut it. I mean, why go through all of this trouble if you are just going to settle for good enough? So, I used a marker to mark my apex, unpinned the darts and redid them so they pointed to the apex.
 |
| Fig. 4. Artist's rendition of the fit in the waist and hips in my muslin. |
At that point, everything looked okay, so I sewed the shoulders and the side seams and tried it on. The result was pretty darn good. There were some diagonal wrinkles coming from the armscye heading toward the shoulder, which I determined were due to sloping shoulders. I pinched out the excess in the shoulder and the wrinkles disappeared. The hem was lower than I liked, perhaps I'm short-waisted? That wasn't a problem because I just pinned the hem up higher. The underarm is still a little wonky, but when you make the sloped shoulder adjustment on the flat pattern, you alter the underarm, too, so maybe that will take care of the issue?
And that's where it currently stands. I wrote everything down and left the muslin to hang in my closet for the last week. I need to transfer the new adjustments to the flat pattern and then I might try a "wearable muslin" in a fabric I don't care that much about. If the fit is good, I'll finish the neckline and armholes with bias-tape (which is what the pattern calls for) and sew the hem!
One of the best things about the Sorbetto pattern is that--minus the pleat--it's pretty much as simple as you can get with a bodice pattern. Therefore, when I'm done with this, I'll essentially have a bodice block/sloper. So, once I have everything exactly right, I'll remove the seam allowances and the pleat and copy the pattern onto oak tag or posterboard or some other stiff, papery product and keep it forever and ever, or until I lose that 30 lbs I've gained since high school (so, really, forever and ever). I think a sloper usually has a jewel neckline and the Sorbetto has a scoop neckline but that's not a huge deal.
I'm hoping that all of this effort will also pay off when I make up the Violet pattern. By comparing the unaltered pattern to my sloper, I will hopefully be able to see at least some of the adjustments I need to make to the pattern and can start a little bit ahead of the game.
*The Sorbetto has a pleat down the front which I sewed down right away so that it wouldn't be a factor during the fitting. I might leave it out for the next fitting because it's mostly a hassle at this stage.