Saturday, June 02, 2012

Wounded, but alive

So, as many people know, there was a sewing meet-up in San Francisco a few weeks ago put together by Karen of Did You Make That and Beth of SunnyGal Studio (you can read more about that here, here, here, and here).  It was wonderful and I got all invigorated about blogging and it was my intention--really and truly--to blog about the event and more about crafting and life, the universe and everything.  Two things prevented me from accomplishing my goal (well three, really, if you count the normal life stuff).  One was that I teach catechism at my church and the kids I work with were going to receive first communion.  If you've done church work, then you know that there's a lot of work that goes into the seemingly simple act of a special church service.  The second was that I went under the knife about a week ago and needed to get ready for that, have it done, and then recover.

Fig. 1.  Fibroid vs. Uterus
The surgery was to remove a ginormous uterine fibroid (non-cancerous).  By ginormous, I mean about the size of a grapefruit.  In comparison, a woman's uterus is about the size of a pear.  The next time you go to the market, look at a grapefruit and a pear to see the difference in size.  So, yes, the fibroid needed to go.  The surgery was something like a C-section but instead of a cute baby, you get a fibroid at the end.  Fortunately, they could go in through the same incision point as my C-section and this has made the healing easier.  Still, I was laid up at the hospital and then at home.  This might sound like a perfect blogging situation, but my in-laws have been here helping with Cate for the last week and a half and I thought it would be sort of rude to not be social when I was awake.  My in-laws are gone now, so I don't have to be social with them, but since we are now lacking their help I won't be able to spend as much time laying around.
Fig. 2.  Saints

Bottom line:  not much knitting, sewing, or blogging to speak of.  Hopefully, I can change that soon.

Saturday, May 05, 2012

Dart Difficulty


So, you're probably wonder how that Sorbetto top is coming.  Well, currently, it's not.  I was hoping to have it done by the time we left for Iowa for Cate's baptism, but we have gone and come back and still no Sorbetto.

When last we spoke re: Sorbetto I had made a boat-load of adjustments and adjusted the dart height on my muslin.  After that, I took it totally apart and transferred the new dart position and the sloped shoulders adjustment to my paper pattern which is now made out of Swedish Tracing Paper (love that stuff!).  Then, I made a new muslin in quilting cotton with the thought that if it came out okay, I would bind the neck and armholes and add it to my wardrobe.

Fig. 1.  A boat-load of
adjustments
Well, it didn't get added to my wardrobe and the problem was the bust darts.  See, I put it on and there were these funky bubbles of fabric at the ends of the darts.  So, I googled "bubble at end of bust dart" (God bless the internet; 10 years ago I would have seen the bubbles and given up) and found that these bubbles are not an uncommon problem.  I tried the easy fixes of resewing the darts several different ways (shortening them, curving them slightly, stitching a few straight stitches at the end of the darts) but nothing seemed to work.  So, I had to resign myself to the idea that, sadly, it was going to take something a little more complicated to fix this issue.  A number of full-busted gals mentioned having this problem and it turns out it can be due to short darts that have to take up a lot of fabric (I actually talked about this with my mom and she agrees that's probably the issue, although she's never experienced it since, if anything, she'd be modifying a shirt with a Small Bust Adjustment; genetics are weird sometimes).  The solution seems to be to divide the one dart into two.

Unfortunately, there doesn't seem to be a lot of information out there about how to change 1 large dart into two smaller darts that are close together and in the same region.  There's information about moving darts around but this was a little bit different.  I eventually decided to measure the distance between the two legs,  divide that number by 2, and draw two new darts that were more diagonal than horizontal to the side seam.  Then, I transferred the markings to the muslin and sewed it all up again and...

...there were still little bubbles at the ends of the darts.

At this point, I put the project in time out.  I only had a day or two until I was leaving for Iowa for Cate's baptism and didn't have time to mess with a misbehaving shirt.  Since then, I've thought about it some more and I think part of the issue may be the fabric as well.  I didn't notice the bubbles on my first muslin which was made from cheap broadcloth.  That fabric had a lot of drape compared to the quilting cotton of the second muslin.  I do still think that taking up so much fabric in such a short dart is going to give me problems, but they'd be less noticeable in a fabric with more drape.
Fig. 2.  A diagonal dart near the hem
will be longer than a horizontal dart
and might be better suited to such
a large dart.

So, I'm still going to have to fix the dart problem.  I've been thinking about how I should do it.  One way is to keep working on making the 2 parallel bust darts.  I was also thinking that if I did a long diagonal dart from closer to the hemline, then I might be able to get away with one dart.  I'm not going to let my difficulties with this project get the better of me, though.  I'm going to have a perfect-fitting top if it kills me!

And then I'm going to make about ten different versions of this shirt because I'm not going through all of this for one measly shirt!

Tuesday, April 03, 2012

No wonder nothing fits

Fig. 1.  "Hi, I'll take that in
a size 12 with a FBA,
swayback adjustment, and
sloped shoulders
adjustment, please."
The process of fitting the Sorbetto pattern has really opened my eyes to why I have such problems finding RTW clothes that fit me properly.  It's not as if I can go into a store and expect it to have shirts with all of the adjustments that I've made on the Sorbetto.  And, I think the swayback issue is why I can never get jeans to fit me around the waist and hips at the same time, particularly low-rise jeans.  Skirts and dresses are usually not too much of a problem if I choose styles with a bit of fullness in the skirt (sheath dresses and pencil skirts can be a problem).

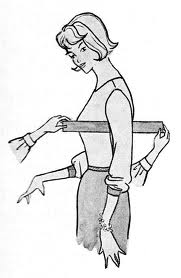
Fig. 2.  This is exactly what my
personal croquis will look
like.  Also, I have a bridge I
want to sell you....
So, really, it's no wonder I mostly buy knits, especially tops.  With a knit, I can get a top that stretches over my bust and still be slightly fitted around the waist.  It's difficult to find knit pants that don't make you look like somebody's grandmother, but I do have one pair that I bought for postpartum wear that still fits and are actually stylish.

Because of these fit issues, I think I'm on the right track in making my own clothes.  In the past, I've shied away from it because I didn't know how to alter patterns to fit.  Also, there's always the chance that I could spend huge amounts of time (and money, sewing your own clothes isn't necessarily the cheapest option) making something only to find that the style doesn't flatter my body in any way.  For this reason, I think I'm going to make a croquis, although I'm not certain I have enough image manipulation skills to really use one effectively.  We shall see.

Friday, March 30, 2012

So, I thought I might update you on making fit alterations to the Sorbetto pattern seeing as it's been a month since I decided to sew the pattern.

Fig. 1  These are the best-fitting 80s clothes
I've seen in a couple decades.
I received Fit for Real People as a Christmas present from my Darling Husband, so I first read everything except the details of each of the adjustments.  There's a lot of good information in there about how patterns are drafted by the major sewing companies, ease, etc.  That is all really helpful as background information although you can find much of that on the 'net these days.  The book really shines in the chapters focusing on diagnosing fit problems and making the proper adjustments.  The problem diagnosis is really invaluable.  (Okay, so there are wrinkles leading away from the armscye but what does that mean?)

Fig. 2.  Fitting would be so much easier
if I had one of these.
In the Palmer-Plestch method, you do tissue-fitting, that is, you pin together tissue pattern pieces and see what the problems are and then make adjustments to the tissue.  Sorbetto does not come as a tissue pattern, rather it is a free, downloadable pdf that you print out on regular 8.5 x 11 paper and tape together.  Therefore, I first needed to trace the pattern onto tissue.

Actually, first, I needed to determine what size to trace.  P-P recommends using the upper bust measurement to determine your size which I did even though it seemed like pure folly to trace out a size 8 when I know I wear a 12 or 14 in RTW.  But hey, they're the fit experts, so I traced out the 8 and did the tissue-fitting.

As a result of that fitting, I made the following adjustments:
  • Broad Back
  • Full Bust
  • Swayback
Fig. 3.  Fitting would also be
easier with an extra pair
of hands.
I should have done the FBA a little differently.  I used the standard method, but that made the armhole really wonky.  I then futzed with the armhole for quite some time trying to get it to fit right.  This might have been avoided if I had noticed this sentence under the heading The "Y" Bust Dart Alteration, "Use this technique for a full bust alteration when more than 1 1/2' is needed to bring the center front of the pattern to your center front."  Live and learn.

Anyway, I made the alterations to the tissue, tried on the tissue again, then traced it onto a clean piece of tissue because the original had just about had it.  Then, I did a muslin.

Now, the P-P method does not have you do a muslin.  They have you tissue-fit and then "fit as you sew," meaning that you cut your garment out of the (potentially expensive) fashion fabric, pin it together, fine-tune the adjustments, and then sew.  Well.  This seemed a little too cavalier for me.  I mean,  I realize that, from their perspective, if you did the tissue-fitting properly, there shouldn't be too much for you to have to fix at this stage.  But, seeing as how this was the first time I'd done most of these adjustments, I wasn't at all sure I had done the tissue-fitting properly.  So, I used some inexpensive cotton broadcloth to make a muslin that I then pinned together and tried on.* 

Right away, I could see there were some issues.  One was that the bust darts were a little too low and weren't pointing at my apex.  Frankly, considering the HUGE FBA I did, I was amazed that they were as close as they were.  But, close wasn't going to cut it.  I mean, why go through all of this trouble if you are just going to settle for good enough?  So, I used a marker to mark my apex, unpinned the darts and redid them so they pointed to the apex.

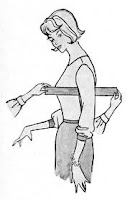
Fig. 4.  Artist's rendition of the fit in
the waist and hips in my muslin.
The next issue was that there was too much ease in the waist and hips.  Now, as you recall, I traced out a size that would have been far too small in the store, so I was a little surprised to see that I had too much room in the waist and hips.  However, as a result of the FBA, I had increased the width of the front by 5 inches and the broad back adjustment had increased the width of the back by 1 inch.  So, I could see how that might have made things a little too roomy.  I pinched out the excess and pinned the seam back together.

At that point, everything looked okay, so I sewed the shoulders and the side seams and tried it on.  The result was pretty darn good.  There were some diagonal wrinkles coming from the armscye heading toward the shoulder, which I determined were due to sloping shoulders.  I pinched out the excess in the shoulder and the wrinkles disappeared.  The hem was lower than I liked, perhaps I'm short-waisted?  That wasn't a problem because I just pinned the hem up higher.  The underarm is still a little wonky, but when you make the sloped shoulder adjustment on the flat pattern, you alter the underarm, too, so maybe that will take care of the issue?

And that's where it currently stands.  I wrote everything down and left the muslin to hang in my closet for the last week.  I need to transfer the new adjustments to the flat pattern and then I might try a "wearable muslin" in a fabric I don't care that much about.  If the fit is good, I'll finish the neckline and armholes with bias-tape (which is what the pattern calls for) and sew the hem!

One of the best things about the Sorbetto pattern is that--minus the pleat--it's pretty much as simple as you can get with a bodice pattern.  Therefore, when I'm done with this, I'll essentially have a bodice block/sloper.  So, once I have everything exactly right, I'll remove the seam allowances and the pleat and copy the pattern onto oak tag or posterboard or some other stiff, papery product and keep it forever and ever, or until I lose that 30 lbs I've gained since high school (so, really, forever and ever).  I think a sloper usually has a jewel neckline and the Sorbetto has a scoop neckline but that's not a huge deal.

I'm hoping that all of this effort will also pay off when I make up the Violet pattern.  By comparing the unaltered pattern to my sloper, I will hopefully be able to see at least some of the adjustments I need to make to the pattern and can start a little bit ahead of the game.

*The Sorbetto has a pleat down the front which I sewed down right away so that it wouldn't be a factor during the fitting.  I might leave it out for the next fitting because it's mostly a hassle at this stage.

Tuesday, February 21, 2012

Operation Sew Practical

One of my sewing goals this year is to sew practical items, which is just a little odd because I haven't sewn much of anything--practical or not--for quite some time.

But.

Fig.1Not practical.
When I dream and plan and hope and wish and think about things to sew, it's almost always not a practical item.  It's a nice dress or fancy pillows for the living room or bedroom or toys or cute little zippered bags.  It's never stuff I really need right now.  It's never stuff that I would absolutely use right now.  The end result of this is that I end up not really sewing anything at all because I have little time to sew and little real use for the things I dream about sewing.  And now I have Cate and, let's face it, newborns are not known for promoting their parents' leisure activities.  So, the odds that I'm going to sewing that dupioni dress are slim to none.  And, even if I did sew it and have some occasion to wear it, I'm sure Cate would spit up on it or have a horrible poopy diaper explosion five minutes after I put it on.

So, it's my mission to sew some practical things this year.  Things that I would actually use or wear right now and can survive close proximity to an infant.  However, practical doesn't necessarily mean boring or unattractive.  There are many lovely machine wash and dry fabrics out there.  And there are many lovely patterns for things other than dresses.

Fig. 2.  Determined to show everyone my bra
One thing I desperately need is a wardrobe full of new shirts.  Most of the shirts/tops/blouses I own are V-neck or scoop neck knits.  The necklines are not really low cut but they are not up around my neck either.  They are comfortable and I find that V-neck and scoop neck tops are the most flattering on me.  Sadly, while practical in the sense that they are wash and dry and I can spray stain remover on them to my heart's content, they are not practical in the sense that I do not want to show my boobs in public.  See, Cate has this habit of grabbing my shirt neck and pulling it every which way, sometimes down below my breasts, and then holding it there such that the entire world can now see my bra.  I don't see this changing anytime soon.

Fig. 3.  What would you call this neckline?
There are two solutions to this problem.  One is to wear crew-neck shirts because then she wouldn't be able to stretch the neckline that far.  I hate wearing crew-neck shirts, they aren't flattering on me and they feel like a noose around my neck.  I recently bought a notched, sort of boat-necked (low scoop necked?) shirt from Eddie Bauer that I like quite well which she cannot pull down enough to expose me and I will likely get a couple more of them.

The other solution is to wear shirts made of woven material.  Here is where we run into big (literally) problems.  Ready to wear shirts are not designed for women with larger than average busts.  I wear a DD or E cup, depending on the bra.  Therefore, if I want to buy a shirt that fits over my chest it either needs to be baggy in design or a size or two larger than what I need to buy to fit the rest of my torso.  Neither of these options is particularly flattering on me.  I can make do by buying a button down shirt that I wear a cami under and only button below my chest but that gets really old (also, what is with most cami-shirts coming with that damn shelf bra in them?  I always have to cut that stupid thing out).

So, if I want to wear a fitted or semi-fitted top made out of a woven material, the best solution is to sew it myself.  This is still a little complicated because I will have to alter the pattern because patterns are usually drafted for a B cup, but it's better than buying a shirt I know does not fit me properly.

I am going to start with the Sorbetto, a free pattern from Colette.  You may recall I was trying to modify this to wear it as a maternity top and never managed to finish it.  I still love the original pattern and would like to make one.  A sleeveless top is not exactly the most practical thing at this time of year, even in Northern California, but it's a very basic top pattern consisting of two pattern pieces and no closures, making a good top to start out with when learning to make a full-bust adjustment.  And, I can still wear it this time of year with a cardigan.  Also, everyone and their dog has made this pattern so there is a lot of inspiration and information out there.  There are several ways to add embellishments or modify the pattern, including adding a short sleeve.

There are several other shirt patterns I'm looking at, too, but I think I'll concentrate on making a couple versions of Sorbetto for now and see how it goes.  I'm setting the goal of having the pattern traced, cut out, and full-bust-adjusted by this time next week.  That seems reasonable even with a little baby in the house, right?

Sunday, February 19, 2012

2012 Goals

It's ridiculously optimistic to talk about sewing and knitting plans when there's a 9 week old baby in the house.  And yet, if I don't start dreaming and planning, I'll never make anything at all.  Still, it's probably better for me to think more about overall goals rather than sit down and make a list of patterns I want to knit and sew.  So, here are my sewing and knitting goals for the year, in no particular order.

Knitting
  • Get Christmas gifts done by October
  • Limit Christmas knitting to my mom, MIL, husband, and daughter
  • Knit something for myself besides dishcloths!
  • Use yarn from my stash
Sewing
  • Sew practical items
  • Make well-fitting clothes
  • Improve finishing details on clothes
  • Use fabric from my stash
  • Sew with patterns I already have (and have never made) rather than constantly buying new ones!

Thursday, February 16, 2012

2011 Christmas Present for Mom


I tried very hard to get my mom's socks done in time for Christmas but I didn't quite make it.  So, I wrapped up the finished sock plus the half-finished sock with the needles still in it and promised to finish the second sock before Christmas 2012.  Feb. 2012 is pretty good, I think, and since she lives in Iowa, she'll still get plenty of wear out of these this winter.


Pattern:  Serpentine Socks from Socks from the Toe Up by Wendy Johnson

Yarn:  Plymouth Worsted Merino Superwash Kettle Dyed, color 1007


Notes:  The pattern called for sport weight yarn but I found that it knit up quite well in this worsted weight yarn.  Normally, I use fingering weight yarn for socks but I knew I would not have enough time to finish a pair of socks at that gauge.  They certainly knit up quickly!


Tuesday, February 14, 2012

Meet Cate

Born Dec. 5, 2011

Here she is, my little sweetheart!  She really loves her baths, as you can tell.  She's 9 weeks old, now, and we're just finally surfacing to the real world.  I've even gotten some knitting time in!


Saturday, December 03, 2011

Still pregnant!

Just dropping by to say that I'm still pregnant even though I am 9 days past my due date!  Come on baby, let's get this show on the road!

Sewing and knitting update:
  • Maternity Sorbetto:  sadly never completed.  I realized I needed to get going on some baby sewing projects if I wanted them to be done before she got here!
  • Baby hats for Cate (my baby):  I knit two pink hats!  Link to Ravelry page here.
  • Bonnet to match Twinkle cardi:  Completed but ENORMOUS!  I think it might fit her when she's one or maybe two.
  • Coming home dress:  I made a "practice" dress so I could get some practice on some of the techniques I hadn't ever done like making pleats and a lapped button closure on the back.  Then, I decided I really liked the practice dress and so now it is the coming home dress.  More details on that soon, I hope!
  • Booties to match the Twinkle cardi:  Just started these a couple of days ago.  I wasn't going to make them because I didn't think I would have time, but it seems that I do have time. :)  They are Christine's Stay-On Booties.
  • Socks for Mom for Christmas:  I started a pair of worsted-weight socks for my mom for Christmas.  They are the Serpentine Socks from Socks from the Toe Up by Wendy Johnson and I have 1 completed and 1 just past the heel.
  • Curtains for the nursery:  I'm making simple panel curtains for the nursery, lined with black-out material.  I have one panel done.  The second panel is a big priority, and then maybe I'll make a valence sometime in the next year or so.  :)

Friday, October 28, 2011

Why, hello there!

It's funny, whenever I take a spontaneous unintentional impromptu break from the blog, I continue to think of blog posts while I'm on break, I just somehow don't accumulate the activation energy necessary to actually write them. 

Probably the worst part about not blogging for awhile is that I end up not commenting on other people's blogs because I know there will be a link to my blog and I don't want a month-old post to be what people see when they click the link.  That is Bad Form, people.  I firmly resolve to eradicate that bad habit because commenting on other people's blogs should be about giving them some comment love, not about what people will see if they click the link back to my blog (and, really, I can always not include the link, right?).

Okay, now that I have that confession out of the way let's get on to what I have been doing since the last blog post, lo those many weeks ago.

First, there has been baby stuff.  Birthing prep classes, a baby care class, and a breastfeeding basics class (because breastfeeding, while natural, is not necessarily intuitive).  Doula interviews (birth and postpartum).  OB visits.  Nursery stuff.  Reading books about giving birth and babies and how not to go crazy in the first couple of weeks.  So, yeah, lots of baby stuff.  I'm a little tired of baby stuff, really.  Yesterday, I read an entire Sherrilyn Kenyon book from cover to cover and man it felt good.

There has been a little crafting but it has all been--you guessed it--baby crafting.  Here are two simple hats I made for my about-to-be-born-any-day-now nephew:


Do you like my little model?  Here he is sans chapeau.


What is he?  He is a Saccharomyces cerevisiae plushie.  S. cerevisiae is a species of yeast that is commonly used to make bread and beer.  It is also a species that is very commonly studied as a model system in biology and one that I used during my thesis work.  This plushie is a crafty rendition of an electron micrograph of a S. cerevisiae cell (OMG guys, I just found that link and now they have mini yeast plushies in a petri dish--squee!).  There are other microbe plushies, too, along with various cells of the body (ie a nerve cell).  Perfect for your friendly neighborhood science geek.  Or anyone with a rather eccentric sense of humor.

I have also almost finished the bonnet for baby Cate's coming home outfit (I am in the midst of casting off!).  I think it, like the sweater, will be a little too big for a newborn, but that's okay.  There has been almost no sewing whatsoever and rather than finish the clothing projects I had started I need to get going on some curtains with blackout lining for the nursery!  They will be very, very simple curtains (basically large rectangles with some ric-rac trim) because I don't really have time or energy for anything else!

So, that's it for now!  The baby is due in 30 days (more or less) so I've only got a few weeks until the craftiness stops dead in its tracks for a maternity hiatus (hopefully not a very long one!).  There's probably no way to get everything done but here is my list of things I'd like to accomplish before Cate appears:

1.  Curtains for the nursery
1.  Booties for coming home outfit
2.  Dress for coming home outfit (which will necessitate a muslin/practice dress before I cut into my real fabric)
4.  Maternity Sorbetto
5.  Maternity denim skirt that I already have 3/4 done (seriously, I just need to hem it).
6.  Sewn knit baby gowns that I have already started.

Wish me luck!


Saturday, September 24, 2011

Busy Building Baby's Boudoir

The lack of posting has been mostly due to the fact that my in-laws came all the way from Boston to help us get the baby's room in order.  We didn't manage to get it completely in order, but all of the heavy-lifting got down and that was the important bit.  The rest J and I can do ourselves.

Most of the actual home improvement work was done by J and his father.  Over a period of four days, they put up some shelves on the wall in the living room (in our new office space), moved the desk from the baby's room to the living room, put shelves on the wall in the baby's room, moved bookcases in the baby's room (most of our books will still be in the baby's room since we don't have any other place to put four 6 ft tall bookcases) and earthquake-proofed them by strapping them to the wall, and painted the accent/mural wall (two colors:  green for grass and blue for sky; I've got flower and butterfly wall decals to decorate the wall with), and, finally, put together the crib and the new Ikea chair for the baby's room.  This was all the more amazing because my FIL has cat allergies and so could only spend four hours a day in the apt. before the cat dander overwhelmed the allergy medicine and his eyes started watering!

While J and his father were bonding over construction, my MIL and I were shopping.  We got a car seat, stroller frame, clothes, crib mattress, bedding, changing pad, and all kinds of baby paraphernalia, mostly necessary (ie bottles), some not-so-much (ie cute dresses).

We still need to touch up the paint on the mural wall, put up the decals, put the crib against the mural wall, finish painting the dresser, put together the baby's bookcase, and put up pictures and other decorations.  Fortunately, we have a month and a half to do it, so I'm certain it will be done by the time the baby makes an appearance!

Monday, September 12, 2011

Finished: Twinkle Cardigan

My first finished handknit for my baby!

Figure 1:  Twinkle Cardigan
Pattern:  Twinkle Cardigan.  A rewritten vintage pattern offered free on Ravelry.
Yarn:  Cascade Heritage 150 sock yarn, 75% merino wool, 25% nylon.
Buttons:  I found the perfect buttons on Etsy (shop:  ABandC)!  They are vintage glass buttons and are so adorable I can't stand it.
Figure 2:  The cutest buttons ever.
Modifications:  Instead of threading a ribbon through the eyelet row around the collar in order to tie the cardigan closed, I added three buttonholes in the button-band area.
Ravelry notes:  here

This cardigan is the first piece in my baby's coming home outfit.  It will be joined by a yellow dress with a white peter pan collar (I had already planned the yellow dress so I was thrilled when I found the white buttons with the little blue and yellow flowers!) and (hopefully) a knit baby bonnet and booties in the same yarn as the cardigan.  The next priority in this little layette is the dress, then I'll work on the bonnet and finally the booties.  I'm working on it all in order of importance (to me) so that if I run out of time, I'll have the most important pieces done.

The cardigan may actually be a little too big for a newborn, but I made it and by golly, she's going to wear it home from the hospital if I have the roll the sleeves up to the armpits and tie a ribbon around her waist to keep it from falling off!

I'm really very proud of this little cardigan and I can't wait to see my baby in it.  It's a pretty easy knit, really (top down construction with no seams) but I'm really impressed with myself all the same.  


Figure 3:  One more shot!


Tuesday, September 06, 2011

Post-baby sewing dreams

Did everyone have a good Labor Day weekend?  My husband and I did nothing of consequence.  Well, I did a little fabric shopping and we made a valiant but failed attempt at hanging some shelves, but other than that, nothing much happened.

I've been thinking about the things I want to sew post-baby (you know, with all that free time I'm bound to have while caring for an infant).  I really got into reading sewing blogs for the first time last spring. Garment-sewing, that is. I have been reading a few craft blogs that had small project sewing and some sewing for kids for probably almost a year. I don't remember how I got into it, exactly, I think I followed a link to a link and started reading Gertie's New Blog for Better Sewing and Casey's Elegant Musings and sort of branched out from there.

At any rate, reading sewing blogs really inspired me to sew for myself and I saw a number of fabulous patterns that I desperately wanted to sew, but I had a little thing that was keeping me from starting those patterns, a little thing that is growing bigger and bigger every day! I could sew to my pre-pregnancy measurements, I suppose but there would be no way to check the fit and who knows if I'll ever get my pre-pregnancy body back (I've heard my boobs will never be the same, for instance) or if I do, how long that's going to take. So, for now, I enviously look at the brilliant garments people have shown and I jealously sigh over the sew-alongs I'd love to participate in, and I dream of the clothes I hope to make one day.

Here are just a few of the patterns I've got in my mental queue:

  • Violet shirt by Collette: A sweet button-down shirt with a peter pan collar. It's specifically labeled for beginners and I think it will be a great way to improve my fitting skills with a blouse that's a little more complicated than the Sorbetto.
  • Ginger skirt by Collette: A fairly simple A-line skirt with three different waistband options. I've made a couple of A-line skirts, but none with this type of waistband. I'd also like to try the option of cutting a striped fabric on the bias and making a chevron pattern. Sunni from A Fashionable Stitch has tips for sewing on the bias and inserting a zipper into bias-cut garments from her Ginger sew-along.
  • Peony dress by Collette:  This is part of their Fall 2011 line.  A simple dress for beginners!
  • Oolong dress by Collette: Are you sensing a pattern here? I do like the Collette patterns! This is a bias-cut dress with a ruched bodice. There are no closures to deal with, but I understand that sewing bias-cut fabric can be a little tricky.
  • Lonsdale dress by Sewaholic: This is fun, summery dress with an interesting neckline. It would require wearing a strapless bra, but I'm willing to put up with that to wear this dress. Tasia did a sew-along for this dress so I have something to refer to if I get stuck.
  • 1940s Swing Dress by Sense and Sensibility: This is just what the title says it is. It has a cross-over bodice and a gored skirt. Casey's Elegant Musings did a sew-along for it so I have a decent amount of reference material to help me make my own.
  • 1950s Collar Confection Blouse from Decades of Style: This is a reproduction of a vintage blouse pattern with a fitted waist and a fun collar. A much more complicated project to be done after I have a couple of (successful) shirts under my belt.
  • Plain and Simple Princess Shirt by HotPatterns: This is a plain, simple, princess seamed button-down shirt. It'll be great to have in my wardrobe and useful for learning to do an FBA on a princess-seamed garment.
You may have notice there are no pants in this list. Pants scare the...pants...off of me (I've acquired a horrible penchant for puns recently, so sorry to put you through it). They seem so complicated! It's a whole different set of measurements to get right. I'd like to try them someday, maybe starting with a really simple pattern with a side-zip (like this one from Hot Patterns).

You may also have noticed that none of the patterns listed are from one of the big 4 pattern companies (Simplicity, Butterick, McCall's, and Vogue). I like the idea of supporting independent pattern makers. They are mostly small businesses run by amazing women who had a vision and the courage to carry it out. It's the kind of thing that's worth supporting in my book. That's not to say I'll never sew a big 4 pattern again (I've got a couple of baby patterns from Simplicity and McCall's in my Not-For-Me queue), just that I want to support small businesses when I can.

So, that's my apres gestation wishlist.  I'm imagining that's a good year's worth of sewing there, given that: 1) I'll have a baby to look after (and I hear they are sort of high maintenance) and 2) I'll have a baby to sew for (all the cute little dresses and rompers and dresses and ruffled diaper covers and dresses!).

Thursday, September 01, 2011

Maternity Sorbetto FBA: Take #2


So, in my first post on modifying the Sorbetto pattern, I mentioned that I was using the book Pattern Fitting With Confidence as a reference.

Fig. 1.  She doesn't look very confident, does she?
 In order to add room for an ample bust, the book suggests increasing the size of the bust dart and adjusting the length of the front in order to compensate for the increase in the size of the dart. Well, I tried that method and it did not give me enough room. In fact, after that modification, I still needed to add at least 2.5 inches overall to the bust area just to get a fitted bust and another 1.5 inches for ease. I'm tempted to say that the Pattern Fitting with Confidence bust adjustment was a complete....bust (ha.ha). Perhaps it works for small increases or maybe I did something wrong? I dunno. Additionally, the book does not give you instructions on how to add more room if you find that your first adjustment is not sufficient. Presumably, you make an even larger dart (because that worked so well the first time), but by how much?

So, I decided to try the "slash and spread" method of increasing the bust size which pretty much seems to be the method of choice on every sewing blog I've ever read. What this method has going for it is that I can make the adjustment based on the size of the gap that resulted from slashing my muslin in the bust area.

However, I think that, rather than attempt to incorporate the changes from the muslin into the front pattern piece, I'm going to just start over. There are a couple of reasons I think this is the way to go. First, because I need to add ease overall in that area (front and back). I think the best way to do this is extend the side seams at the bustline on both the front and back pattern pieces. The second reason is I want to determine if the slash and spread method FBA will give me the right fit in the bust from the very beginning. I think this will be useful since it seems that the slash and spread FBA will be my method of choice in the future and it would be good to know how well it works.

So, following the instructions from here, I spent about 3 hours making pattern alterations Wed. night. For real. I can only hope that things will go faster the second time I try to do an FBA!

Fig. 2.  My pattern adjustment tools.  Not shown:  tape.  Lots and lots of tape.
 At any rate, the first thing the instructions tell you to do is a tissue fitting. I have never tried doing a tissue fitting before, but there's a first time for everything.

To do the fitting, I traced the original pattern onto tissue paper. I traced out a size 10 in the shoulders and armholes, a size 14 in the side seams until the waist, and blended to a size 18 at the hem. I pinned the dart closed as if I had sewn it and pressed it down, pinned the pleat out of the way so I could see where the center of the front was, and pinned the front and back together at the side seams and shoulders, then tried it on in front of a mirror. I didn't take pictures of the tissue fitting because of that whole not wanting half-naked pictures of myself on the internet thing. The result was that the center of the pattern was offset from the center of my torso by 2 inches.
Fig. 3.  An artist's rendering of my tissue fitting.

So, changes made to the pattern:
  • Full Bust Adjustment. Using the slash and spread method, I increased the bust by 2 inches. This increased the dart, lengthened the pattern, and increased the waist by 2 inches.
  • Changed the dart position. After the FBA, the dart was no longer pointing to the apex. The dart was also no longer horizontal but sort of pointing downward. I tried to follow the instructions for changing the dart, but I needed to rotate it to make it horizontal again. The result is that I'm not quite sure I have the dart right and I think I may have lost a little room in the side seam? I dunno. I figured I'd go to the muslin stage and see how it turned out.
  • I also added six inches length to the center front to make sure my belly was covered. I curved the hem to the original size 18 hemline at the side seam.
  • I had to add 7/8 in. in length to the back side seam to get it to match up with the front side seam after the FBA. Then, I added 1 in. in length to the center back and curved the hem to the newly drawn hemline at the side seam.
Now, because I blended to a size 18 from the waistline to the hemline and I added 2 inches to the width of the waist while doing the FBA (more on that in a second) and I'm only sewing the pleat down to just past my bust, I believe I will have ample room for my big belly with a little room to grow, even. So, I didn't need to do a special adjustment to make this a maternity top.

Fig. 4.  You too can wear a tent!
Which brings me to my next point, what would I have done if I wasn't pregnant? The waist would have had 4 total inches added to it (since the pattern piece is half of the front, the total added is 2 in. x 2)!!!

 That's really not going to work post-pregnancy. So, how does one fix that? Do you put in a second dart at the waist?  I don't think that would look right on this particular pattern since it is meant to be only slightly fitted.  Do you somehow close that area up?  Take the extra out of the side seams?  Part of the point of doing an FBA (I thought?) was to add room to the bust and nowhere else to avoid making something that fit like a muumuu.

At any rate, after making all of the changes listed above, I pinned the tissue pieces back together and tried it on again.  It seemed to fit, so I'm going forward with the muslin.  We'll see what happens when I try this in fabric!

Fig. 5.  Behold!  The Frankenpattern!

Wednesday, August 31, 2011

Hold the phone--new patterns from Collette!


So, so excited to see the fall offerings from Collette which are now available for pre-order. I am particularly excited to see the pattern for the Jasmine blouse which has a simple shape that I think I can modify to be a maternity top! Woot! I think I'll be making the 2nd view (shown above) which has a simple tie in the front and not a bow (bows and ruffles in that area often make my bust look overwhelming, although maybe it would help balance out the big belly?).

I also like the Peony dress which will be going on the post-baby wishlist (more on that another time). The Clover cigarette pants (also shown in the image above) I am not so enamored with. Skin-tight pants do not look so good with my thunder-thighs. Would love for them to come out with a simple, straight-legged pant. That would be awesome.

------
Instead of saving the image straight off the website, I did a screen capture. Does that address copyright issues? I'm leery of taking the photo directly from the site, but I feel like if I do a screen capture, it's now my photo of their photo and therefore okay to show.

Friday, August 26, 2011

Learning to slow down

Hand-basted sleeve/armscye seam

The other day, I cut out a newborn-sized baby gown (McCall's M6103) from a cute little green knit with pink ladybugs on it. The pattern seemed to be very straightforward--front, back, sleeves, drawstring hem at the bottom that I'm putting elastic in instead. However, I ran into trouble at the very beginning (!) while attaching the picot-edged elastic to the neckline. The machine didn't seem to want to feed it through and would get stuck and just stitch in one spot for awhile. Also, even though I pinned the bejeezus out of it, in some places I was sewing on just the elastic (that is, not attaching it to the fabric). I wasn't sure how to solve the feed problem, but I knew it would be easier to make sure I was sewing on the elastic + fabric if I hand-basted the elastic onto the neckline first.

I dunno, I seem to have this psychological/pride issue with basting. I have this sense that I should be good enough at the machine to not need to hand-baste seams together or trims to the garment. Why I think this, I don't know, considering that I'm a relative beginner at sewing. When I point that out to myself, I then say to myself that I should practice, practice, practice to get better, not use hand-basting as a crutch.

I maybe need therapy.

At any rate, I realized that could: A) stitch and rip out and restitch and rip out until I became so frustrated I gave up on the entire project OR B) I could just hand-baste the elastic on the neckline and then machine stitch it and move on with my life. I decided to go with choice B. And, of course, the hand-basting did make the machine stitching a lot easier (as did pulling on the elastic slightly while I stitched) and it wasn't very much trouble to take out the basting stitches afterward. So, lesson learned. Then, I turned to the sleeve where I encountered another point of stubborn pride: easing in fullness.

Easing is when you sew one piece of fabric to another piece that's shorter. So, there's more fabric on one side of the seam than the other. The instructions usually just tell you to attach the sleeve (it may suggest basting first), easing in the fullness, which is something I've tried to do on other garments via pinning with limited success. It always gets bunched up in one spot or I get little tucks in places when it's supposed to be just a smooth line. I think one way to avoid this problem is to stitch a gathering stitch along the longer piece of fabric and gather it evenly, then pin the sleeve to the armhole, then hand-baste to make sure I've got it the way I want it, then machine stitch it. But, again, I have avoided using this method due to pride.

Actually, it's not just pride that keeps me from gathering and hand-basting and such, it's time. I am not much of a process sewer (one who sews just for the enjoyment they get from stitching), I'm more of a product sewer (one who sews primarily because they want the finished project). So, I'm not a fan of going slow or doing things the long way. I want shortcuts. But, I've finally, finally come to accept that if I want a good quality finished product, I need to do whatever it takes to make that happen even if it means doing things the long way (like hand-basting picot-edged elastic to a baby gown).

So, I'm trying to slow down and enjoy the process more, like how soothing it was to do the basting by hand, actually.

Maternity Sorbetto Muslin Fitting


So, aided by my trusty helper (I can trust that he will always stop whatever he is doing and come lay on my sewing) I cut the modified Sorbetto pattern pieces out of muslin and machine basted them together. I didn't bother putting the binding on the armholes or neckline because they're not necessary for fit and that's all I'm looking at right now. I didn't hem it either, just sewed a basting stitch where the hem would fall after being sewn so I would have some idea where that would be. I did sew the pleat down to just past the bust, pressed it, and basted it at the top to sort of anchor it down.

So, the first issue materialized as I was sewing the side seams.


Evidently, despite my efforts to curve the hemline back to the tip of the original side seamline, the back is still shorter than the front. So, I'll adding length to the back for sure.

Then, I tried the muslin on.


It looks surprisingly good, given all of my adjustments and the fact that I'm a novice at pattern adjusting!

The good stuff:
  • The belly area doesn't look as tentish as I feared after cutting out the modified pattern (which just means that my belly really is that big now *sigh*) although there's definitely room for my belly to grow so I will be able to wear this top for awhile (I live in the SF Bay Area, so we will be having sleeveless top weather for awhile yet).
  • I like where I ended the pleat. It gives definition to the top of the...uh...top and offers something to draw the eye away from the big honkin' belly below. For the real deal, I may embellish the pleat more, maybe with buttons or a little bit of lace or ribbon down the sides of the pleat? I don't know, we'll see what inspiration grabs me.
  • By not sewing the pleat all the way down the front, I did get extra room for my belly, so that little bet paid off.
  • The bust darts are at the right level, pointing straight at the "apex" of my bust (I guess it's not common in sewing to just say "nipple").
  • For the most part, I like how the shoulders, neckline and underarm fit which tells me that starting with a size 10 in that area was a good idea.
The not-as-good stuff:
  • Well, obviously, I need to add some length to the back so it will match the front
  • I'm going to add length to the front, too. I like the length exactly how it is without the hem. So, I need to add the amount of the hem (5/8 inch) to the front before adding length to the back.
  • There was a tiny amount of gaping under the arm that I pinched out.
  • The upper back feels a bit tight just above the waist. Now, this could be due to problems in the bust, but I don't think so for reasons I'll get into later.
  • The bust darts seem a little long, ending almost at the apex. I might make them about half and inch shorter.
The major issue:

  • It is way too tight in the bust.
So, the biggest modification I need to make is to add room in the bust. I first tried removing some of the stitching in the pleat so that it was shorter and left more room for my bust. But, I didn't like how that looked (there was a distinct increase in tentness) so I resewed it. So, in order to figure out just how much to add to the bust area, I needed to slash the middle of the top, to see how much it spread apart at the bust. But, of course, I had this pleat there and as soon as I started slashing, the pleat was going to have all of this extra fabric flapping around. So, I sewed down the sides and middle of the pleat in order keep it tacked down during the slashing.

I didn't take a photo of this part because I'm not keen on putting pictures of me in my bra on the internet. So, trust me when I say that I there was a gap of about 2.5 inches in the bust area after slashing. Now, I assume that if I do an FBA to add 1.25 inches (since the pattern piece is half of the front, I need to use half of the total gap distance), I will end up with a fitted bust. However, the pattern is supposed to have about 3 inches of ease (I figured this out by looking at the pattern size chart and comparing the finished measurements of the bust to the sewist's bust measurement). That's 1.5 inches of ease for the front. So, I'm trying to decide if that means I should add 0.75 inches to the side seam at the bust and do an FBA for 1.25 inches or should I do an FBA that adds 2 inches to the bust (1.25 + 0.75) in order to get the proper fit?

The upper back was still a bit tight after slashing the front so I think that I need to add some width there. Again, there should be 1.5 inches of ease across the back and at the moment, it's skin tight. So, I need to add 0.75 inches to the pattern piece (which is 1/2 of the width of the total back). I'm guessing that means that I simply need to go up a size or two in that area to get the back right.

So, more pattern modifications and a new muslin are in the works (also a trip to the fabric store because I am fresh out of muslin). Hopefully this new round of modifications will fix the current problems without creating new ones!

Monday, August 22, 2011

Sorbetto modifications

It's starting to be all baby all the time here at e-beth knits, so I thought I'd throw in something that is only a little bit baby.

Ever since the Sorbetto pattern was released, I've been wanting to make one. It's a pretty simple, slightly fitted slip-on top (no closures) with a box pleat detail in the front and the armholes and neck are finished with bias tape. I've resisted making the top until now because, of course, I am currently not at my regular body size/shape. For instance, my stomach now sticks out further than my boobs. This is a little weird considering it's been about 25 years since anything on my body has stuck out further than my boobs.

But, I have an overwhelming urge to make myself a top, so, I decided to try and modify the Sorbetto to make it a maternity top. Considering that: 1) I've yet to make a top that fits me and 2) I'm completely new to pattern modification, I may well have bitten off more than I can chew. Nevertheless, I sat down at the table with my Sorbetto pattern, and my various pattern-adjusting accoutrement. These included: freezer paper for tracing, a tracing wheel, pens and pencils, a curved ruler, a calculator, a notebook, tape, push pins, and a cardboard cutting mat.

So, first up, I had to decide what pattern size to use. I decided to tackle the back first since I didn't need to adjust for boobs or belly. According to my upper bust measurement, I should use a 10. So, I started with that. I want to keep the back fitted and not baggy (to minimize the "tent effect" so prevalent in maternity tops), so I decided I would try cutting the back piece as though I wasn't pregnant and adding all of the extra inches to manage my belly to the front piece. Therefore, I measured my back across my natural waist approximately from side seam to side seam and decided I need a 14 there, so I basically drew a line that went from the size 10 line at the armhole to the size 14 line at the narrowest part of the pattern. Then, I drew a line from there to the size 18 line at the hem to account for my hip measurement. Then, I traced the pattern onto the freezer paper. Finally, I wanted to make the hemline curve (because I am making the front hemline curved so that I can add extra inches in the middle to cover the belly), so I extended the line for the center back (to be placed on the fold) 1 inch and used my curved ruler to draw a curve to the original hemline at the side seam. That was all pretty straightforward.

Next, I tackled the front which was not at all straightforward. I started with a 10 on top (shoulders and armholes) and then I did a Full Bust Adjustment. I used the technique in Pattern Fitting With Confidence by Nancy Zeiman which is unlike anything I've seen on the web, but I figured I'd give it a try. Essentially, she has you increase the bust dart according to cup size and increase the length of the front to account for the change in dart size. So, I traced a size 10 and cut it out, then followed the FBA instructions from the book, and cut that pattern piece out. That was all relatively easy. Then, I ran into something of a wall. Briefly, moving the side seam out by three inches at the waist gave me something that looked like the bust and the waist couldn't connect without creating some funky shape. I decreased the amount I added to the waist by half because I thought that if I didn't sew down the center box pleat past the bust, I would end up having extra room from that. Eventually, I was able to draw a line I thought might work for the side seam. Then, I wanted to add length to make sure it covered my belly. I added 3 inches to the center front and curved the hem to the original hemline at the side seam. Hopefully, this means that the front and back pieces will line up. Having made all of those adjustments, I cut this final pattern piece out (I numbered all of my drafts of the pattern, btw, and wrote on them what adjustments they incorporated so I could keep them straight)

Bottom line: the front pattern piece doesn't much resemble the original Sorbetto front pattern piece any longer. Actually, it looks amazingly tentish (is so a word!) which is something I've been trying to avoid with maternity wear (I feel like a blimp already, I don't need an immense, baggy shirt to emphasize that fact). So, I'm not at all convinced this modification will work at this point, and even if it does work and everything fits, I'm not sure I'm going to like how it looks on me. But that's why you make a muslin, right?

Friday, August 19, 2011

Embroidery Practice


As I mentioned in my "Updates" post, I purchased the Daisychain ABCs Embroidery Sampler from Posie Gets Cozy earlier this summer. I loved the look of the finished sampler and it seemed like it would be a lot of fun to stitch up. However, when it arrived I felt a little intimidated by it. It involved quite a number of different embroidery stitches, most of which I had never done. Also, it was crewelwork, which means that instead of using cotton embroidery floss, you use wool yarn, something I had not worked with in embroidery. Now, I understand that the original purpose of a sampler was to practice your embroidery stitches, but since I wanted to display this in the baby's room I really wanted it to look nice and not like somebody's first attempt at crewelwork.

So, I decided that, as a first step, I would practice the new-to-me embroidery stitches on something a little less dear. To that end, I went to the Embroidery Basics series put together by Mollie at Wild Olive. I particularly wanted to see how she did the stem stitch because I anticipated having a little trouble with it since I am a "stabber" when it comes to embroidery, not a "sewer." With that post, there was a free practice pattern (pdf) designed by Mollie so you could practice your stem stitch. I downloaded the pdf, transferred the design to white muslin using a micro-tip marker, and got to work.

Using this cute little pattern, I practiced chain stitch, backstitch, stem stitch, long and short stitch, satin stitch, fern stitch, and horizontal flat stitch:


The horizontal flat stitch is not represented in the Daisychain sampler, but one that I found in a book* while looking for instruction on fly stitch (which was not part of the Wild Olive series and I didn't quite understand the stitch diagram that came with the sampler). The book suggested horizontal flat stitch specifically for leaves, so I thought I'd give it a try. Unfortunately, you can't really tell the difference between it and the satin stitch in this photo, but it does look different in person. Also, you can see that I did the stem stitch two different ways--the traditional "sewing" way and a modified way found on the Wild Olive blog that I felt much more comfortable with and produced (in my opinion) a neater stitch.

So, after completing this practice piece, I decided to start on the Daisychain sampler itself. So far, the work has gone well, though working with the wool does take a bit of getting used to. In particular, it's very difficult to thread the needle and I find myself not wanting to rip out stitches that are wonky because it's such a pain in the butt to get the needle rethreaded. I'm using a needle-threader now, even though I had always considered needle-threaders a tool for the weak. :)

Returning to my little leaf sampler, even though it is a practice piece, I find that I'm kind of attached to it and pretty proud of the way it turned out. Therefore, I'm thinking about doing a couple other nature-themed little samplers and displaying them together somewhere in some simple hoop frames. There are lots of free embroidery patterns online, I'm sure I can find something that goes nicely with my little leaves.

-----------------------
*The Good Housekeeping Needlecraft Encyclopedia, ed. Alice Carroll, 1947. I picked this up at a used book sale a number of years ago.

Wednesday, August 17, 2011

Twinkle cardigan


Twinkle Cardi sans one sleeve

So, back before I knew the baby was a boy or a girl, I started the Twinkle Cardigan (Ravelry link). This is a vintage pattern that was rewritten and is a free pdf download on Ravelry. I decided to go ahead and do the original eyelet pattern in the body and sleeves of the sweater (the knitter who rewrote the pattern uses stockinette for the body and arms but included the eyelet pattern in case we wanted it) because it would make the knitting more interesting and I didn't think it was too girly for a boy (which, at that time, I was convinced we were going to have). The yarn is Cascade Heritage Sock yarn which is a lovely sock yarn at a reasonable price and perfect for a baby sweater.

The pattern calls for a ribbon tie at the top as a closure, but I decided that buttons were more practical and safer so I added buttonholes.


Since I'm just a few knitting hours from being done with the knitting, I should start thinking about the buttons. Here are a couple options I'm considering:


Yellow polka dot buttons (from Super Buzzy)

Red apple buttons (from Super Buzzy)


I've been looking on etsy, too, in the vast, vast realm of "vintage buttons." Most of them are far too big, but every so often I find some smaller ones that might work. I'm probably going to have to bite the bullet and just buy a few different ones and then see which ones work the best.