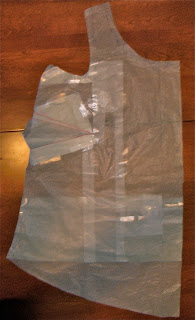
So, in my first post on modifying the Sorbetto pattern, I mentioned that I was using the book Pattern Fitting With Confidence as a reference.
 |
| Fig. 1. She doesn't look very confident, does she? |
So, I decided to try the "slash and spread" method of increasing the bust size which pretty much seems to be the method of choice on every sewing blog I've ever read. What this method has going for it is that I can make the adjustment based on the size of the gap that resulted from slashing my muslin in the bust area.
However, I think that, rather than attempt to incorporate the changes from the muslin into the front pattern piece, I'm going to just start over. There are a couple of reasons I think this is the way to go. First, because I need to add ease overall in that area (front and back). I think the best way to do this is extend the side seams at the bustline on both the front and back pattern pieces. The second reason is I want to determine if the slash and spread method FBA will give me the right fit in the bust from the very beginning. I think this will be useful since it seems that the slash and spread FBA will be my method of choice in the future and it would be good to know how well it works.
So, following the instructions from here, I spent about 3 hours making pattern alterations Wed. night. For real. I can only hope that things will go faster the second time I try to do an FBA!
 |
| Fig. 2. My pattern adjustment tools. Not shown: tape. Lots and lots of tape. |
To do the fitting, I traced the original pattern onto tissue paper. I traced out a size 10 in the shoulders and armholes, a size 14 in the side seams until the waist, and blended to a size 18 at the hem. I pinned the dart closed as if I had sewn it and pressed it down, pinned the pleat out of the way so I could see where the center of the front was, and pinned the front and back together at the side seams and shoulders, then tried it on in front of a mirror. I didn't take pictures of the tissue fitting because of that whole not wanting half-naked pictures of myself on the internet thing. The result was that the center of the pattern was offset from the center of my torso by 2 inches.
 |
| Fig. 3. An artist's rendering of my tissue fitting. |
So, changes made to the pattern:
- Full Bust Adjustment. Using the slash and spread method, I increased the bust by 2 inches. This increased the dart, lengthened the pattern, and increased the waist by 2 inches.
- Changed the dart position. After the FBA, the dart was no longer pointing to the apex. The dart was also no longer horizontal but sort of pointing downward. I tried to follow the instructions for changing the dart, but I needed to rotate it to make it horizontal again. The result is that I'm not quite sure I have the dart right and I think I may have lost a little room in the side seam? I dunno. I figured I'd go to the muslin stage and see how it turned out.
- I also added six inches length to the center front to make sure my belly was covered. I curved the hem to the original size 18 hemline at the side seam.
- I had to add 7/8 in. in length to the back side seam to get it to match up with the front side seam after the FBA. Then, I added 1 in. in length to the center back and curved the hem to the newly drawn hemline at the side seam.
 |
| Fig. 4. You too can wear a tent! |
That's really not going to work post-pregnancy. So, how does one fix that? Do you put in a second dart at the waist? I don't think that would look right on this particular pattern since it is meant to be only slightly fitted. Do you somehow close that area up? Take the extra out of the side seams? Part of the point of doing an FBA (I thought?) was to add room to the bust and nowhere else to avoid making something that fit like a muumuu.
At any rate, after making all of the changes listed above, I pinned the tissue pieces back together and tried it on again. It seemed to fit, so I'm going forward with the muslin. We'll see what happens when I try this in fabric!
 |
| Fig. 5. Behold! The Frankenpattern! |


No comments:
Post a Comment