- Renfrew: A t-shirt pattern from Sewaholic. I would like to try sewing with knits and I love 3/4 length sleeves, which is one of the options with this pattern. I actually started making a muslin in Oct. and got sidetracked with life. I may even have most of the pieces cut out. I don't think it's going to be a wearable muslin because I used two remnants of interlock fabric from the remnants bin at Joann's and they don't match. :) I need to think about getting some fabric for the "real" version I'll make after the muslin.
- Ginger: An A-line skirt from Colette. I really love me an A-line skirt. They are so easy to wear and flattering. And the weather here is such that I could wear the skirt with tights or some tall boots or both.
- Tiramisu: This is the first pattern by a new company called Cake and I really love the version I recently saw on Lladybird. The designer is having a 30 min. a day sew-along for the pattern in Jan. 30 minutes a day sounds just about doable, I think.

Friday, December 14, 2012
Just Because
In my last post, I talked about starting to spend some of my free time making things just for the fun of it (as opposed to making things as gifts or because they are needed). I sort of vaguely remembered writing a post way back when about sewing patterns I wanted to tackle post-pregnancy (I was a little delusional on how much free time I'd have, I suppose) and I looked over that list of items and wasn't sure they were still on my To Sew list. So, here are the top 3 choices on my To Sew list.
Wednesday, December 05, 2012
"Free" Time
A week or two ago, I was reading a post by Tilly and the Buttons in which the Pomodoro Technique was mentioned. I had never heard of such a method so I looked it up. Briefly, it is a time management technique that makes heavy use of a kitchen timer. As I read about the technique, I stumbled across something that really made me think about how I use my time,
Some months ago, I was reading an article somewhere (maybe in Time magazine?) about what is often called (by women- and family-studies type people) the "second shift." In this context, second shift is the shift that you start after you get home from work. It is housework, cooking, taking care of the kids. Traditionally, most of second shift was done by women, but things have changed so that more men are taking second shift responsibilities. The article claimed that there were studies showing that men and women were spending equal amounts of time on second shift work and had equal amounts of free time, but this was not leading to women having less stress and responsibility. This was due to how men and women were handling their free time. During their free time, men spent their free time on things that had nothing to do with the home and kids. In contrast, women were spending their free time on: planning birthday parties, making things for the kids, reading to the kids, making stuff for the house, decorating the house, shopping for the family, etc. These things were all related to the home, but women were calling it "free time" and not counting it as second shift work. And if they weren't actively doing something for the family, they were talking about the family, keeping in touch with relatives, and, in general, thinking about family stuff.
I've been thinking about free time a lot lately, how much of it I have, and what I do with it. I've come to the conclusion that I have fallen into the same trap as the women in the Time article--my free time is not really free. If I'm knitting, it's a gift for someone's birthday or for Christmas. If I'm sewing, it's for Cate or some occasion or something for the apartment or somebody's gift or because I think sewing is likely one of the best ways to have nice clothes that fit me properly and so it is a skill I need to learn to help with one of life's basic necessities. Lately, the only reading I've been doing is listening to audio books while I knit or sew. In other words, there is precious little I do just for the hell of it, because I enjoy doing it.
Many of the things I do in my so-called free time are things that I enjoy, such as knitting and sewing, but I am not doing those things to relax, I'm doing them because I need the end product for my family. Consequently, I'm not actually enjoying the things that I supposedly do for enjoyment. There is a level of stress associated with my knitting and sewing because the things I am crafting are needed for some purpose other than for me to meditate and relax.
Of course, knitting and sewing inherently have an end-product associated with them, an end-product that is often useful in some fashion. It's one of the reasons I love to craft, to make something with my hands, to create something that is lasting. However, it's easy, then, to slip into making things only because you need them and not for enjoyment. It's easy to turn your hobby into work and to trick yourself into thinking you are spending time relaxing when in reality what you're doing does not give you any relaxation or enjoyment.
They say that all work and no play makes you dull. I always heard that line and thought dull = boring and maybe that's what was meant. But dull is also the opposite of sharp and I think it's also valid to say that all work and no play makes you less sharp. Free time is needed to cultivate creativity and creativity keeps you sharp.
The upshot of all of this navel-gazing is that I think I need to re-think my sewing and knitting queues. On several of the sewing blogs I read (blog-reading, btw, is one of the few thing I do for pure enjoyment), I've seen people talk about needing to make more "cake" instead of "frosting." I wish I could relate. I think I may be making a lot of spinach. Or possibly sugar-free, fat-free cookies. Cake might actually be a step up in creativity and fun. I think my goal for the upcoming year is going to be to have more cake and less veggies. To start, I'm going to make a list of things I want to make for myself. No gifts, no stuff for Cate, just stuff for me, me, me. I'm going to actually use some of the patterns and material I bought and have been saving to make things for me in order to actually make things for me. I'm going to use some of the beautiful sock yarn I've bought in the last few years and make myself some socks. And, not on a deadline. Not because I need a new skirt because I have no clothes that fit. Just because.
Perhaps that should be my new crafting motto: Just because!
"The Pomodoro Technique shouldn’t be used for activities you do in your free time. In fact, applying the Pomodoro would make these activities scheduled and goal-oriented. That’s no longer free time."
Some months ago, I was reading an article somewhere (maybe in Time magazine?) about what is often called (by women- and family-studies type people) the "second shift." In this context, second shift is the shift that you start after you get home from work. It is housework, cooking, taking care of the kids. Traditionally, most of second shift was done by women, but things have changed so that more men are taking second shift responsibilities. The article claimed that there were studies showing that men and women were spending equal amounts of time on second shift work and had equal amounts of free time, but this was not leading to women having less stress and responsibility. This was due to how men and women were handling their free time. During their free time, men spent their free time on things that had nothing to do with the home and kids. In contrast, women were spending their free time on: planning birthday parties, making things for the kids, reading to the kids, making stuff for the house, decorating the house, shopping for the family, etc. These things were all related to the home, but women were calling it "free time" and not counting it as second shift work. And if they weren't actively doing something for the family, they were talking about the family, keeping in touch with relatives, and, in general, thinking about family stuff.
I've been thinking about free time a lot lately, how much of it I have, and what I do with it. I've come to the conclusion that I have fallen into the same trap as the women in the Time article--my free time is not really free. If I'm knitting, it's a gift for someone's birthday or for Christmas. If I'm sewing, it's for Cate or some occasion or something for the apartment or somebody's gift or because I think sewing is likely one of the best ways to have nice clothes that fit me properly and so it is a skill I need to learn to help with one of life's basic necessities. Lately, the only reading I've been doing is listening to audio books while I knit or sew. In other words, there is precious little I do just for the hell of it, because I enjoy doing it.
Many of the things I do in my so-called free time are things that I enjoy, such as knitting and sewing, but I am not doing those things to relax, I'm doing them because I need the end product for my family. Consequently, I'm not actually enjoying the things that I supposedly do for enjoyment. There is a level of stress associated with my knitting and sewing because the things I am crafting are needed for some purpose other than for me to meditate and relax.
Of course, knitting and sewing inherently have an end-product associated with them, an end-product that is often useful in some fashion. It's one of the reasons I love to craft, to make something with my hands, to create something that is lasting. However, it's easy, then, to slip into making things only because you need them and not for enjoyment. It's easy to turn your hobby into work and to trick yourself into thinking you are spending time relaxing when in reality what you're doing does not give you any relaxation or enjoyment.
They say that all work and no play makes you dull. I always heard that line and thought dull = boring and maybe that's what was meant. But dull is also the opposite of sharp and I think it's also valid to say that all work and no play makes you less sharp. Free time is needed to cultivate creativity and creativity keeps you sharp.
The upshot of all of this navel-gazing is that I think I need to re-think my sewing and knitting queues. On several of the sewing blogs I read (blog-reading, btw, is one of the few thing I do for pure enjoyment), I've seen people talk about needing to make more "cake" instead of "frosting." I wish I could relate. I think I may be making a lot of spinach. Or possibly sugar-free, fat-free cookies. Cake might actually be a step up in creativity and fun. I think my goal for the upcoming year is going to be to have more cake and less veggies. To start, I'm going to make a list of things I want to make for myself. No gifts, no stuff for Cate, just stuff for me, me, me. I'm going to actually use some of the patterns and material I bought and have been saving to make things for me in order to actually make things for me. I'm going to use some of the beautiful sock yarn I've bought in the last few years and make myself some socks. And, not on a deadline. Not because I need a new skirt because I have no clothes that fit. Just because.
Perhaps that should be my new crafting motto: Just because!
Monday, November 26, 2012
Still here
It's been a busy month--November has just flown by! We went out to visit my in-laws in the Boston area for ten days in the middle of the month and it seems like the whole month has revolved around that trip--preparing for it, experiencing it, and recovering from it. I haven't even looked at my sewing machine (okay, that's a lie, it sits on a table next to my bed so I see it every night; it would be more accurate to say that I look at it and quickly turn away, knowing I have no time to sew).
I have a bunch of projects that are about 30 minutes from being finished languishing in my closet. But, J is off at a telescope in Hawaii, so I'm alone with Cate for the week. O!M!G! I have new-found respect for single moms. I mean, I always respected them, but now I am in serious awe of their ability to stay sane.
I have a bunch of projects that are about 30 minutes from being finished languishing in my closet. But, J is off at a telescope in Hawaii, so I'm alone with Cate for the week. O!M!G! I have new-found respect for single moms. I mean, I always respected them, but now I am in serious awe of their ability to stay sane.
Sunday, November 04, 2012
Hey there Little Red Riding Hood...
 |
| Image Copyright Elisabeth Montegna, All Rights Reserved |
Size: 1
Fabric: Robert Kaufman 21 wale corduroy, Moda A Walk in the Woods Bluebell Mushrooms, white cotton flannel
Notions: 1 button
Changes to the pattern: 1) underlined with white cotton flannel, 2) used a button instead of velcro, 3) omitted the applique, and 4) changed how hood is attached (see below).
So I "finished" Cate's red, hooded cape with about 20 minutes to spare before trick or treating commenced. "Finished" because I haven't top-stitched it yet, and because I may change the closure. I didn't want to use a velcro closure like the pattern called for because Cate sees velcro as only a minor obstacle in the road of clothes/shoes removal, however, she hasn't figured out buttons yet. I got a large button and made a vertical buttonhole on the tab. It looks pretty good when it's sitting on a hanger, but the tab sort of slides around on the button (due to the size of the buttonhole) and it causes the cape to hang strangely. I may make a smaller tab and either use a smaller button and a horizontal buttonhole or use a snap. Also, I had to wing the buttonhole because the button was too large for the autobuttonhole foot on my machine. And, I need to use some tear-away stabilizer on the next buttonhole (if I decide to use a button).
I underlined the cape with cotton flannel so that it would have a bit more weight to it and she can use it as her Bay Area-appropriate winter coat. It's certainly easy to get on and off her with no sleeves to deal with!
The pattern was very simple and quite easy to work with, but I decided to change how the hood attached to the cape. The directions called for attaching the main fabric hood to the main fabric cape and the lining hood to the lining cape, then placing the main fabric and lining right sides together and stitching around leaving a gap to turn it right-side-out, then top-stitching. I didn't like that idea because I thought that the lining might get really bag and out of whack in the hood because it's only attached on the sides and not anywhere in the middle. So, instead, I stitched the hood in the main fabric and lining, then I sewed them together around the face, flipped it right-side-out and top stitched around the face. Then I hand-basted it to the neck of the main fabric and sandwiched it between the main and lining fabric when I sewed the cape pieces together (does that make sense? it might help if I had taken pix, but given the fact that I barely finished it for trick or treat you can see why I didn't stop to take pix!).
Adding the hood this way created some minor issues, like the part of the hood surrounding the face and the opening of the cape are supposed to be flush and this would've been much easier to accomplish using the directions with the pattern. Also, having the main fabric, underlining, and lining all attached to each other meant that I had to try to pull a very thick hood through the opening I left for turning the body of the cape right-side-out.
All in all, I'm quite happy with the way it turned out (except for the closure issue I mentioned above). I had no trouble getting her to wear it, although she did fidget with it as you can see in the photos, experimenting with moving her arms around under the cape. It made for a great first Halloween costume: simple, easy to get on and off, and she can wear it the rest of the winter here so it was worth the time and effort spent sewing it up nicely. The corduroy is really lovely and soft and the mushroom fabric looks so cute and the blue sets off Cate's eyes. What more can you ask for in a project?
Thursday, October 25, 2012
Waist-nipper Review
The thing about having a baby is that it changes your body in ways that you might not expect. Two weeks after giving birth to Cate, I was at my pre-pregnancy weight but not my pre-pregnancy waistline. I assumed that this was because I had a grapefruit-sized fibroid still in my uterus, but after having had that removed, my waistline actually didn't change (which is really odd when you think about it). Having a baby seems to have given me a permanent pooch.
Everybody's body changes with time. The effects of gravity on the bustline are fairly well-known, for instance. And don't get me started on the dark spots on my face that seemed to have just shown up one day out of the blue. And, I've gained 40 lbs since high school (most of it in grad school which tends to have that effect on people; the freshman fifteen has nothing on the grad school thirty). But, I have to say I find the pooch the most disturbing change of all. I think it's because it's not something that happened gradually over time and it is absolutely counter to my pre-pregnancy body type.
Everyone accumulatesfat weight in different places but each individual person usually has a standard place added weight shows up on their body. I have, ever since I was aware of the concept of putting on weight, put on weight in my thighs and butt. Sure, it accumulates in other regions but always proportionately to everywhere else (except, of course, when it goes straight to my thighs). I have always had what may politely be called athletic thighs even though I have never, ever been athletic. But, I have never, ever had a stomach pooch until now. Frankly, it's upsetting. It just makes my body look wrong to me. My body is now fundamentally a different shape than it was before. In all my years, my body may have gotten bigger around, but the proportions have stayed the same. Now it is off, weird.
As far as I can determine, the pooch is due to a loosening of muscles that occurs during pregnancy as a way to allow your belly to make room for your baby. It is often worse in women with twins and triplets and, while I only had one baby, I also had a very large fibroid in there with her which may have contributed to this pooch business.
Lord this is getting long. At any rate, it seems that the right set of exercises can help minimize the pooch, but what do I do until then?
A lot of the sewing blogs that I read are written by people who like and often wear vintage (or repro-vintage) style. And, of course, Mad Men has made certain vintage style more popular. And, if you read about vintage style long enough, eventually you are going to read something about vintage foundation garments. It seems that, in times past, if you didn't have the right body shape to fit in the fashions of the time, you buckled yourself into enough shapewear garments until you did. Then, times progressed and we did away with restrictive foundation garments and that has come to be seen as a way of declaring our freedom of the restrictions of the past. Now, we are infinitely more progressive and in order to fit into the fashions of the time, we shame people about their bodies so they will attempt to lose weight so that they will have the right body shape and in the process become neurotic, stressed, and unhealthy.
It may just be me, but I think shapewear was probably a kinder solution.
ANYWAY (will she ever come to the point? you wonder), in the 1950s, if you wanted to be fashionable, you needed to have a tiny waist. If you were not blessed with a tiny waist, then you wore a waist-nipper or a waspie.
So, I decided to try one of these out and purchased a Flexees waist-nipper and wore it all day today. My activities today included taking care of an infant, shopping at target, and a nap. It was comfortable enough that I did all of those things while wearing it and never thought, "Dear God, how did women in the 50s do it?" (the thought that I might feel like I was being tortured all day was one of the reasons I had never tried a waist-nipper until now). Most of the time, I forgot it was there.
Now, another reason I wanted to try the waist-nipper was that I have been having a problem with my lower back and I thought it might provide some extra support (I mean, a waist-nipper is really just a nicer-looking version of one of those supportive back belts, when you come to think of it). I am happy to say that my back did feel better at the end of today than it has felt at the end of most days.
So, all in all, I think it was a good investment. It was comfortable, helped with my back, and of course it contained the pooch (also, I think it may have helped keep might tights from falling down, always a good thing). I'm not sure I want to wear one every single day, mind you (in the summer it would be far too hot to be wearing that sort of thing all the time), but it was comfortable enough and beneficial enough to my back to want to wear one most days during the fall and winter. I'll just have to hope that the pooch is moderated by the time next summer rolls around!
(Edited to add: Gertie of Gertie's New Blog for Better Sewing has talked about foundation garments in many of her posts. This one is the one that really made me start thinking about how women have tried to achieve a desirable shape in the past vs the present. )
Everybody's body changes with time. The effects of gravity on the bustline are fairly well-known, for instance. And don't get me started on the dark spots on my face that seemed to have just shown up one day out of the blue. And, I've gained 40 lbs since high school (most of it in grad school which tends to have that effect on people; the freshman fifteen has nothing on the grad school thirty). But, I have to say I find the pooch the most disturbing change of all. I think it's because it's not something that happened gradually over time and it is absolutely counter to my pre-pregnancy body type.
Everyone accumulates
As far as I can determine, the pooch is due to a loosening of muscles that occurs during pregnancy as a way to allow your belly to make room for your baby. It is often worse in women with twins and triplets and, while I only had one baby, I also had a very large fibroid in there with her which may have contributed to this pooch business.
Lord this is getting long. At any rate, it seems that the right set of exercises can help minimize the pooch, but what do I do until then?
A lot of the sewing blogs that I read are written by people who like and often wear vintage (or repro-vintage) style. And, of course, Mad Men has made certain vintage style more popular. And, if you read about vintage style long enough, eventually you are going to read something about vintage foundation garments. It seems that, in times past, if you didn't have the right body shape to fit in the fashions of the time, you buckled yourself into enough shapewear garments until you did. Then, times progressed and we did away with restrictive foundation garments and that has come to be seen as a way of declaring our freedom of the restrictions of the past. Now, we are infinitely more progressive and in order to fit into the fashions of the time, we shame people about their bodies so they will attempt to lose weight so that they will have the right body shape and in the process become neurotic, stressed, and unhealthy.
It may just be me, but I think shapewear was probably a kinder solution.
ANYWAY (will she ever come to the point? you wonder), in the 1950s, if you wanted to be fashionable, you needed to have a tiny waist. If you were not blessed with a tiny waist, then you wore a waist-nipper or a waspie.
So, I decided to try one of these out and purchased a Flexees waist-nipper and wore it all day today. My activities today included taking care of an infant, shopping at target, and a nap. It was comfortable enough that I did all of those things while wearing it and never thought, "Dear God, how did women in the 50s do it?" (the thought that I might feel like I was being tortured all day was one of the reasons I had never tried a waist-nipper until now). Most of the time, I forgot it was there.
Now, another reason I wanted to try the waist-nipper was that I have been having a problem with my lower back and I thought it might provide some extra support (I mean, a waist-nipper is really just a nicer-looking version of one of those supportive back belts, when you come to think of it). I am happy to say that my back did feel better at the end of today than it has felt at the end of most days.
So, all in all, I think it was a good investment. It was comfortable, helped with my back, and of course it contained the pooch (also, I think it may have helped keep might tights from falling down, always a good thing). I'm not sure I want to wear one every single day, mind you (in the summer it would be far too hot to be wearing that sort of thing all the time), but it was comfortable enough and beneficial enough to my back to want to wear one most days during the fall and winter. I'll just have to hope that the pooch is moderated by the time next summer rolls around!
(Edited to add: Gertie of Gertie's New Blog for Better Sewing has talked about foundation garments in many of her posts. This one is the one that really made me start thinking about how women have tried to achieve a desirable shape in the past vs the present. )
Tuesday, October 16, 2012
KCWC: Wrapping up
The Kids Clothes Week Challenge ended yesterday and I'm pretty pleased with what I managed to accomplish!
Sewing
1. Cate's Blue Pants
Pattern: Big Butt Baby Pants by Made by Rae
Fabric: Navy Blue Cotton Sateen (remnant from blue Meringue)
Notions: 1/2 inch non-roll elastic
Notes: I cut a 12-18 mos size because Cate is nearly 11 mos and I want her to be able to wear these for awhile. They were, not to put too fine a point on it, GINORMOUS. Of course, eventually they would fit her (you know, maybe in March, or possibly June) but I wanted her to be able to wear them now. There are no side seams, so I just pinched some fabric and sewed up each side, taking them in by 1.5 inches total. Then, I folded the waistband over twice, thus removing an inch from the top, and made a very wide hem at the bottom, taking about 2 inches off of the length. I measured her waist and sewed the waistband as directed (leaving a little extra elastic on the ends so I can let out the waist later). However, the pants kept sliding down her butt, so I tightened them up this evening. I trimmed all of the seam allowances and zig-zagged the seam allowances together.
2. I Like Big Butts and I Cannot Lie
Pattern: Big Butt Baby Pants by Made by Rae
Fabric: Stretch Denim (remnant from an ill-fated maternity skirt)
Notions: 1/2 inch non-roll elastic, single-fold bias tape
Notes: I really liked how the first pair of BBB pants turned out, so I decided to make a second pair out of a denim remnant I had laying around (I love that I can use my remnants to make clothes for Cate!). This time I cut a size 6-12 mos on all sides except the bottom hem which I cut at the 12-18 mos length so that I have plenty of fabric to let them out. No pictures because I haven't finished them yet. This time I'm finishing the seams with single-fold bias tape.
3. Little Red Riding Hood Cape
Pattern: Maisie Cape
Fabric: Robert Kaufman 21 wale corduroy and Moda A Walk in the Woods/Bluebell Mushrooms; both purchased from Purl Soho
Notions: Velcro
Notes: This project is still in its infancy since I just got the fabric. I need to figure out how I should go about getting the wrinkles out of the corduroy (I have this feeling I'm not supposed to just iron it) and there is a slight issue with the Bluebell Mushrooms lining fabric (see below). I'm going to start cutting it out as soon as I finish BBBP #2, though, since Halloween is coming soon.
Knitting
1. Purple Cardigan
Pattern: Anya Cardigan from Vintage Knits for Modern Babies
Yarn: Knitpicks Comfy in Blackberry
Needles: US sizes 3 and 5 circulars
Buttons: Good question!
Notes: I've been working on this cardigan for forever and a day it seems. Fortunately, I like how it's turned out! I still need to pick out buttons, however. I'm having a bit of difficulty with that seemingly simple task. I've got some vintage metal buttons with little flowers on them, but I'm not sure if I can wash them and I don't want to have to snip them off and reattach them every time I wash the cardigan (and, seeing as how it's for a baby, the cardigan will likely be washed frequently). I've thought about somehow pinning them on, but I'm a little nervous about putting pins in Cate's clothes, even if they are safety pins. Anyone have any ideas about how to get around this issue (aside from using different buttons which I have already thought of!)? I also want to add grosgrain ribbon to the button bands to help stabilize them, but otherwise the cardigan is done. I hope to get pix of it soon.
Lessons Learned
1. Setting aside time to craft for an hour a day does my heart and soul good. It also means my projects move along faster. Not just because I'm actually setting aside time to work on them but also because committing to an hour of crafting everyday means I'm less likely to rush to get something done. This results in fewer mistakes, less ripping out, and more forward progress.
2. Don't order fabric at 3AM. I meant to order 1.5 yards of the Bluebell Mushrooms fabric and instead ordered 0.5 yards. I'm going to call around to local quilt shops to see if I can find more because I really don't want to pay shipping again!
3. My baby is not as big as I think. However, better to make something too big than too small!
Sewing
1. Cate's Blue Pants
 |
| Cate's Photoshoot or Why It's Difficult to Get Good Pix of Handmade Baby Items Image Copyright Elisabeth Montegna, All Rights Reserved |
Pattern: Big Butt Baby Pants by Made by Rae
Fabric: Navy Blue Cotton Sateen (remnant from blue Meringue)
Notions: 1/2 inch non-roll elastic
Notes: I cut a 12-18 mos size because Cate is nearly 11 mos and I want her to be able to wear these for awhile. They were, not to put too fine a point on it, GINORMOUS. Of course, eventually they would fit her (you know, maybe in March, or possibly June) but I wanted her to be able to wear them now. There are no side seams, so I just pinched some fabric and sewed up each side, taking them in by 1.5 inches total. Then, I folded the waistband over twice, thus removing an inch from the top, and made a very wide hem at the bottom, taking about 2 inches off of the length. I measured her waist and sewed the waistband as directed (leaving a little extra elastic on the ends so I can let out the waist later). However, the pants kept sliding down her butt, so I tightened them up this evening. I trimmed all of the seam allowances and zig-zagged the seam allowances together.
2. I Like Big Butts and I Cannot Lie
Pattern: Big Butt Baby Pants by Made by Rae
Fabric: Stretch Denim (remnant from an ill-fated maternity skirt)
Notions: 1/2 inch non-roll elastic, single-fold bias tape
Notes: I really liked how the first pair of BBB pants turned out, so I decided to make a second pair out of a denim remnant I had laying around (I love that I can use my remnants to make clothes for Cate!). This time I cut a size 6-12 mos on all sides except the bottom hem which I cut at the 12-18 mos length so that I have plenty of fabric to let them out. No pictures because I haven't finished them yet. This time I'm finishing the seams with single-fold bias tape.
3. Little Red Riding Hood Cape
Pattern: Maisie Cape
Fabric: Robert Kaufman 21 wale corduroy and Moda A Walk in the Woods/Bluebell Mushrooms; both purchased from Purl Soho
Notions: Velcro
Notes: This project is still in its infancy since I just got the fabric. I need to figure out how I should go about getting the wrinkles out of the corduroy (I have this feeling I'm not supposed to just iron it) and there is a slight issue with the Bluebell Mushrooms lining fabric (see below). I'm going to start cutting it out as soon as I finish BBBP #2, though, since Halloween is coming soon.
Knitting
1. Purple Cardigan
Pattern: Anya Cardigan from Vintage Knits for Modern Babies
Yarn: Knitpicks Comfy in Blackberry
Needles: US sizes 3 and 5 circulars
Buttons: Good question!
Notes: I've been working on this cardigan for forever and a day it seems. Fortunately, I like how it's turned out! I still need to pick out buttons, however. I'm having a bit of difficulty with that seemingly simple task. I've got some vintage metal buttons with little flowers on them, but I'm not sure if I can wash them and I don't want to have to snip them off and reattach them every time I wash the cardigan (and, seeing as how it's for a baby, the cardigan will likely be washed frequently). I've thought about somehow pinning them on, but I'm a little nervous about putting pins in Cate's clothes, even if they are safety pins. Anyone have any ideas about how to get around this issue (aside from using different buttons which I have already thought of!)? I also want to add grosgrain ribbon to the button bands to help stabilize them, but otherwise the cardigan is done. I hope to get pix of it soon.
Lessons Learned
1. Setting aside time to craft for an hour a day does my heart and soul good. It also means my projects move along faster. Not just because I'm actually setting aside time to work on them but also because committing to an hour of crafting everyday means I'm less likely to rush to get something done. This results in fewer mistakes, less ripping out, and more forward progress.
2. Don't order fabric at 3AM. I meant to order 1.5 yards of the Bluebell Mushrooms fabric and instead ordered 0.5 yards. I'm going to call around to local quilt shops to see if I can find more because I really don't want to pay shipping again!
3. My baby is not as big as I think. However, better to make something too big than too small!
Thursday, October 11, 2012
KCWC: Day 5--Actual Sewing!
I finally got a chance to sew! I sewed up all of the seams on the BBBpants and made the waistband casing. I want to measure my daughter before adding the elastic and hemming the pants and she is asleep so that is going to have to wait until tomorrow.
Now, onto finishing the sweater!
Now, onto finishing the sweater!
KCWC Days 3 and 4
 |
| Kaufman 21 wale corduroy |
 |
| Moda: Bluebell Mushrooms |
 |
| Baby blues |
Day 4
I didn't actually get any sewing time on Wed. for various reasons, but mostly because by the time I was able to sew my husband wanted to go to bed and my sewing machine and accoutrements are in the bedroom. Instead, I worked on the sweater I've been knitting forever and a day. I have finished the collar and woven in most of the ends. All that remains is to sew the button bands (this sweater has a sort of odd construction which requires sewing on the button bands at the end; I'll be changing that if I ever knit this sweater again), weave in the last few ends and sew on buttons. Excuse me, I have to choose buttons, then sew them on. The choosing could take some time, unfortunately.
Goals for Day 5
- Sew blue BBB pants
- Assemble cape pattern and cut it out so it's ready when the corduroy arrives
- Sew on the button bands, finish weaving in ends, and sew on buttons for sweater
- Figure out what to make next!

Tuesday, October 09, 2012
KCWC: An inauspicious beginning
As part of my KCWC, I went to Joanns to buy some red corduroy fabric for Cate's Little Red Halloween costume. I was looking for plain old red. You know. The color red you'd get in a box of eight crayons. They did not have regular ole red corduroy. The best they had was a brick red. You could purchase fuschia corduroy or sparkly purple corduroy, but plain old red corduroy was no where to be found. I then wandered the aisles trying to become inspired by some other bright red fabric, but the only one I found that was remotely acceptable was a bright red wool. It was beautiful, but I'm not going to go through the hassle of preshrinking wool for a cape my baby daughter will likely wear for one season.
I spent well over an hour at the fabric store trying to find acceptable fabric and I am counting that time for the challenge. Then, I came home and fought with my computer to print the Big Butt Baby Pants pattern pieces for another half hour. I'm not sure why my computer was refusing to print pages 14-16 and instead sending out sheets of blank paper. I finally gave up and went to bed.
This evening, I went to the superbuzzy website to see if they had bright red corduroy and, if not, at least order the lining fabric and trim. But the website is down for maintenance. So, I have tried printing the BBBpants pattern again. I suppose I should go see if the printer has decided to print them out tonight. If you hear screams of rage and anguish from the SF Bay area, you'll know who they are coming from.
Friday, October 05, 2012
Kids Clothes Week Challenge
So, I've been wanting to make Cate some clothes for, oh, ever since I knew I was going to have a baby. In my vision, half of the clothes Cate wore were cute little dresses and rompers and overalls that I made for her with handknit sweaters for every outfit. The reality has been somewhat less than that. I have managed to make two dresses, a sweater, a bonnet for her baptism, and some booties for her baptism. Oh, and some newborn hats.
 |
| Me: 15 months |
 |
| Me: 15 months |
In any case, it's been on my List to make Cate clothes since she was the size of a grape, but so far I haven't done much in that vein until now. I have signed up for the Kids Clothes Week Challenge at elsie marley. The challenge is to spend one hour a day from Oct. 8-14 working on making kid's clothes.
 |
| Me: at 2 yrs |
- Red, hooded cape: This year, Cate will be Little Red Riding Hood for Halloween. This decision is pretty much purely practical. It's simple, involves no makeup, and she can wear the cape after Halloween, too. I'm envisioning a red corduroy with a sweet, fairytale lining and maybe cute trim.
- Purple sweater: If I haven't finished the purple sweater I've been working on for the last several months by Oct. 8, I'll include it in this challenge.
- Big Butt Baby Pants: I cloth diaper. I'm not fanatical or militant or evangelical about it, but I do feel pretty good about not having all of the diapers Cate's worn for the last 10 months sitting in a landfill for all eternity. The key is that it isn't much more difficult than disposable diapering because we have a diaper service. If we didn't have a diaper service, we would be adding to the landfill. In any case, a cloth diaper + cover is bulkier than a disposable diaper and so there is some difficulty getting pants to fit. Generally, I manage by going one size up, but then the legs are far, far too long. Made By Rae has a pattern that is specifically designed for cloth diapered babies called Big Butt Baby Pants. I need to make several for her for the winter, but I'll settle for one pair made out of denim for now.
- Coat: I'm actually not sure about this one. She does need a heavy coat because we are visiting relatives in Boston mid-Nov. Seeing as how we live in the Bay area, she's not likely to need it much after that. I was looking for a coat with a removable lining because I thought that might be more useful, but haven't found one yet. That might be a little more than what I want to take on, but I'm thinking about making some sort of cute, wool swing coat. I know that I would like to tackle making myself a wool frock coat one of these years and this would allow me to work with the same sort of materials on a smaller scale without having to worry too much about fit issues (since children are pretty much rectangles with arms).
Tuesday, September 25, 2012
Now what?
I've been thinking about my crafting priorities for the rest of the year. While looking through A Verb for Keeping Warm's website, I came across a group endeavor called Seam Allowance. The members pledge to work toward increasing the number of handmade items in their wardrobe to be at least 25% of the total. Practically speaking, they are talking about being able to wear at least one handmade item every day (this includes accessories, such as scarves, jewelry, and headbands/hats/fascinators, etc.). This seems like a very worthy goal and a good way to be a bit more thoughtful about your wardrobe and your creating.
For instance, if you are hoping to wear one handmade item a day and you don't usually wear a lot of dresses (and don't want to), then your sewing goals should reflect that. Sunni of A Fashionable Stitch has been talking about this issue as well. You may really enjoy sewing dresses, but if you never wear them you might want to curb your enthusiasm a bit. Likewise, you should think about sorts of clothes you wear everyday and if they are the kind of clothes you want to wear or are you looking for a change. Then, you can plan your sewing/knitting/crocheting/weaving/jewelry-making appropriately.
Right after I had Cate, I really tried to dress thoughtfully most days. I was (and still am) worried about "letting myself go." It's so easy, after having a baby, to wear yoga pants and a t-shirt most days, just put your hair in a ponytail, and forget about make-up, but it seems to be difficult to break that habit. So, I worked on wearing business (very) casual most days and tried to put on make-up everyday. However, I let that slip somewhere along the line. Maybe it was because as Cate became more aware of and involved in her surroundings, it was harder for me to find time to put myself together each day. Whatever the reason, these days I throw on whatever's handy and rarely wear make-up.
I want to get back to being more thoughtful about my appearance. I almost always feel better (happier, more self-confident, less self-conscious) when I feel I am dressed well. I want to put on clothes that make me feel good, not just whatever is easiest (and still clean!). This is going to take some thinking about what I would like to wear and what is practical to wear (since I spend quite a bit of time on the floor with Cate, or chasing after her, or having her suddenly start gnawing on my leg).
My Meringue skirt was a step in that direction. I made it out of navy blue cotton sateen with no embellishments beyond the scalloped hem. It's comfortable, practical, looks good, and, because it's fairly plain, it can be worn more than once a week. It's a neutral color so it should go with most of the shirts I own. It's lined (or rather, it soon will be) so that I can wear it with tights in the winter. I need to finish up this Meringue, however. I barely got it wearable in time for the launch party. I did that by not lining it and choosing to ignore a few issues (like the puckering at the hem). I still need to cut, sew, and attach the lining, fix the puckers, finish some seams and fix a couple of issues with the zipper. I'm hoping to get that done by the end of the week.
But, what to work on after I finish the Meringue?
- Meringue v2.0: I should have done a swayback adj. for Meringue v1.0, so I'm going to try to do that in Mv2.0. I'm also thinking about playing with some piping and using contrast fabric for the facings and attaching them to the outside. I have a khaki cotton sateen similar to the navy I used for Mv1.0 and I was thinking of dark brown gingham for the facings. That will make it different enough from Mv1.0, but still neutral/basic enough to wear with most things in my wardrobe.
- Renfrew: The weather in the bay area is such that I could probably spend most of the year wearing 3/4 sleeve shirts, but I don't often find 3/4 sleeve t-shirts that I like. Therefore, I purchased the Renfrew pattern from Sewaholic which comes with three neckline styles and three sleeve styles.
- A button-down shirt: I'm trying to get away from wearing t-shirts all the time. I don't want to get rid of them completely (which is why I want to make a Renfrew or three), but I would like to be able to wear a fitted button-down shirt once in a while. Unfortunately, my bustline makes it difficult to find a RTW fitted button-down shirt that actually fits well. Sewing to the rescue! I'm not sure what pattern I'll use for this project.
- Thurlow trousers: Another Sewaholic pattern. I would love to wear skirts every day, but, realistically, that's not practical at this time in my life. However, I have a helluva time finding pants that fit properly. Between having a curvy figure, large thighs, a super-long crotch depth, and a swayback, it's really a miracle I can find RTW pants that fit at all! Fortunately, I have one pair of jeans that actually fits fairly well and since I know the rise/crotch-depth is right on these jeans, I'll measure them and use that measurement as a starting point for my muslin. The pattern is geared toward pear-shaped women, and while I'm not exactly pear-shaped, I do have all of the issues the pattern is supposed to address.
Monday, September 24, 2012
Colette Party at Verb
Camnesia (noun) Forgetting you have your camera with you while at an event. ex. I won't be showing pix of the Colette launch party because I had camnesia.
The Colette Launch Party at A Verb for Keeping Warm was wonderful! I got to meet Sarai and have her sign my The Colette Sewing Handbook. I had forgotten that I had bought my book from the Colette website and therefore it was already signed (which is why I bought it off the website to begin with). So, it was amusing when Sarai opened the book to sign it and her signature was already there! I asked her to sign it again which she was happy to do. :)
Sarai was really lovely. I got to talk with her for a little while and I may or may not have gushed over her in a fangirl sort of way. It's not often you get to meet a famous person that you have admire. The party at Verb was just the right size for the space and ended up being intimate enough that not only was it possible to get Sarai to sign my book (again), but I also was able to talk to her a little bit about sewing and writing a book. I was even able to show her the scallop hem of my Meringue and ask her how to fix a small issue with it (OH YES I DID).
I loved talking with bloggers and non-blogging sewists (I had a little discussion with a couple other stay-at-home-moms about the challenges of being a mom including trying to sew with baby brain + exhaustion and the frustration of your kids being more happy to see Daddy when he comes home than they seem to be to see you all day!).
This was really so much fun and that leads me to this point: if you have an opportunity to attend an event like this (a blogger meet-up, a launch party, a book signing)--GO! Seriously. I have attended these sorts of events for science, knitting, and sewing and even if I don't know any of the people before getting there, I always have a wonderful time. The reason, I think, is that it is an opportunity to be with "your people." Seriously. How often do you get to sit with a group of people and talk about your hobby and everyone understands 1) nearly everything you are saying and 2) your enthusiasm for it? At the launch party, I was surrounded by people who love to sew (at every level of experience), enjoy Colette patterns. People who actually recognize the garment I was and complimented me as only another sewist could. People were asking each other about the garments they were wearing and what they had made recently and did they have any tips for making Clover?
I can't wait for the next blogger meet-up!
The Colette Launch Party at A Verb for Keeping Warm was wonderful! I got to meet Sarai and have her sign my The Colette Sewing Handbook. I had forgotten that I had bought my book from the Colette website and therefore it was already signed (which is why I bought it off the website to begin with). So, it was amusing when Sarai opened the book to sign it and her signature was already there! I asked her to sign it again which she was happy to do. :)
 |
| Double-signed by Sarai |
Sarai was really lovely. I got to talk with her for a little while and I may or may not have gushed over her in a fangirl sort of way. It's not often you get to meet a famous person that you have admire. The party at Verb was just the right size for the space and ended up being intimate enough that not only was it possible to get Sarai to sign my book (again), but I also was able to talk to her a little bit about sewing and writing a book. I was even able to show her the scallop hem of my Meringue and ask her how to fix a small issue with it (OH YES I DID).
 |
| Sarai suggested clipping closer to the seam to get rid of that pucker. |
I loved talking with bloggers and non-blogging sewists (I had a little discussion with a couple other stay-at-home-moms about the challenges of being a mom including trying to sew with baby brain + exhaustion and the frustration of your kids being more happy to see Daddy when he comes home than they seem to be to see you all day!).
This was really so much fun and that leads me to this point: if you have an opportunity to attend an event like this (a blogger meet-up, a launch party, a book signing)--GO! Seriously. I have attended these sorts of events for science, knitting, and sewing and even if I don't know any of the people before getting there, I always have a wonderful time. The reason, I think, is that it is an opportunity to be with "your people." Seriously. How often do you get to sit with a group of people and talk about your hobby and everyone understands 1) nearly everything you are saying and 2) your enthusiasm for it? At the launch party, I was surrounded by people who love to sew (at every level of experience), enjoy Colette patterns. People who actually recognize the garment I was and complimented me as only another sewist could. People were asking each other about the garments they were wearing and what they had made recently and did they have any tips for making Clover?
I can't wait for the next blogger meet-up!
Saturday, September 22, 2012
No waistband
I'm not sure what is going on, but every time I try to add a waistband to Meringue, it throws off the fit. So, I'm doing away with the waistband. I really would like to have this skirt done by tonight and I'm starting to realize that part of my problem with sewing right now is perfectionism. I could fuss with this skirt for eternity and never achieve perfection. And therefore, never have a skirt. Well, basta! Enough! I'm going to sew this skirt sans waistband and I will love it and wear it to death!
Friday, September 21, 2012
A change of plans
Previously, on e-beth knits:
The next day, I decided to try the muslin on again--this time with a pair of Assets on board and without the waistband. I also tried the advice of Palmer-Pletsch and let out the front darts over my "full tummy" (or as I like to call it, "that part of my body that has not been the same since pregnancy"). At that point, it seemed like I had a ridiculous amount of extra fabric at the side seams. So, I pinned it in at the sides, and compared it to the pattern. Now it appeared I should cut a 12 at the waist, expanding to a 14 by the hips (I originally cut an 18). I modified my paper pattern accordingly, took out the side seams of my muslin, drew the new seamline, and tried it on again.
It looked awesome (well, as awesome as a muslin can look)! I'm not sure how to explain how I went from needing to add extra room to a size 18 muslin to taking in that same muslin several sizes. I mean, I know letting out the darts and wearing shapewear helped, I just don't see how it could have helped that much.
I still think I want a waistband and I drafted one last night but then didn't have time to cut it out and try it on the muslin. I'll do that tonight and then (fingers crossed!) I'll cut the fashion fabric as well. I'm not sure I'll have much time on Sat. to sew which means I'll need to get as much as possible done tonight. I can see myself wearing jeans and hemming my skirt at the Bay Area Sewists Meetup that's before the launch party, then putting on the skirt right before the launch. :) I don't think there's any way I'll get the lining put in by tomorrow afternoon, either, but I can add that afterward.
Wish me luck!
In trying on the Meringue muslin: the skirt had no ease, the waistband gaped, and there was fabric pooling above my butt.
The next day, I decided to try the muslin on again--this time with a pair of Assets on board and without the waistband. I also tried the advice of Palmer-Pletsch and let out the front darts over my "full tummy" (or as I like to call it, "that part of my body that has not been the same since pregnancy"). At that point, it seemed like I had a ridiculous amount of extra fabric at the side seams. So, I pinned it in at the sides, and compared it to the pattern. Now it appeared I should cut a 12 at the waist, expanding to a 14 by the hips (I originally cut an 18). I modified my paper pattern accordingly, took out the side seams of my muslin, drew the new seamline, and tried it on again.
It looked awesome (well, as awesome as a muslin can look)! I'm not sure how to explain how I went from needing to add extra room to a size 18 muslin to taking in that same muslin several sizes. I mean, I know letting out the darts and wearing shapewear helped, I just don't see how it could have helped that much.
I still think I want a waistband and I drafted one last night but then didn't have time to cut it out and try it on the muslin. I'll do that tonight and then (fingers crossed!) I'll cut the fashion fabric as well. I'm not sure I'll have much time on Sat. to sew which means I'll need to get as much as possible done tonight. I can see myself wearing jeans and hemming my skirt at the Bay Area Sewists Meetup that's before the launch party, then putting on the skirt right before the launch. :) I don't think there's any way I'll get the lining put in by tomorrow afternoon, either, but I can add that afterward.
Wish me luck!
Thursday, September 20, 2012
Meringue (hold the lemon)
This weekend, the Colette trunk show is coming to a local fiber store, A Verb for Keeping Warm (Verb carries yarn, fiber for spinning, knitting, spinning, and weaving supplies, and fabric). As soon as the date was announced, I knew that I wanted to make a garment from a Colette pattern to wear to the show/party, so I decided to make the first project in The Colette Sewing Handbook, Meringue.
Meringue is a scalloped hemmed, slightly A-line skirt. There are two skirt pieces--the front and back--plus the facings, and a side invisible zip. I am adding a waistband to the pattern because I think that will be more flattering for my figure type. I am also lining the skirt so that I don't need to wear a slip. The fashion fabric is a navy blue cotton stretch sateen from Joanns and the lining is a fuschia poly lining material. I've decided that I will hem the lining to where the scallop-hem facings end because I don't want to deal with a scallop-hemmed lining.
I tried to do a tissue fitting Monday night and gave up in frustration, which was what prompted me to write the Tissue Fitting is Dead to Me post. Next, I cut out the front and back in cheap broadcloth, sewed the darts and seamed the sides together. Then, I needed to think about the waistband. Colette has a tutorial for making a waistband for Meringue which involves slashing the pattern near the top, adding seam allowances to both pieces and then sewing the top piece as the waistband. I like this idea, but I decided that I wanted the skirt to sit higher on my waist and I didn't want to show more leg. So, I decided to try Gertie's method of making a waistband (tutorial here, but I used the method from her new book which is slightly different). In her book, Gertie says that the waistband pattern can be used with any skirt type, so I thought it would work for my skirt. I sewed the waistband and attached it to my skirt and tried on the skirt.
Several issues showed up right away:
- The skirt had no ease. I wanted it to be fairly fitted but this was a little over the top. To add ease to the skirt, I think I'm going to make my seam allowances 3/8 inch instead of 5/8 inch. That adds 1/2 inch to the body of each side of the skirt resulting in 1 inch of ease over all. I think this will be plenty because the fabric has some stretch to it.
- The waistband gaped. This is likely due to my swayback. I think this problem may be solved by using a curved waistband. Therefore, I'm going to draft a waistband by closing the darts and tracing the top of each pattern piece, adding two inches in height, adding 5/8 seam allowance to all sides, and adding one inch in length to the front waistband piece so that I can make a tab.
- Fabric pooling just above my butt. This is also a swayback issue, I think, and will hopefully be solved by taking a wedge shaped tuck near my waist in the back.
Wednesday, September 19, 2012
Tissue Fitting: Not a fan
So, for Christmas last year, I received the Palmer-Pletsch book, Fit for Real People. Since then, I have been trying to follow their advice as much as possible, and their method is based almost entirely on tissue fitting. They claim that if you do a good tissue fit, then you don't need a muslin.
Well, frankly, tissue fitting is just not working for me. I had my doubts about it to start with, really. I mean, generally speaking, tissue is not going to act the same as fabric. I've been tracing my patterns onto Swedish tracing paper (the idea being that I could actually baste it together at the end and sort of have a muslin), but I think this is actually making things worse not better. The Swedish tracing paper is pretty stiff and, as I'm not making everything in taffeta, doesn't give me anything near an accurate representation of how the garment will actually lay once I make it in fabric. Tissue paper is a little better, but I don't like working with it because it's too delicate and prone to ripping. This is why P-P recommends stabilizing certain areas.
Well, I've come to realize that, by the time I trace off the pattern, mark the seam allowances, put tape everywhere I'm supposed to put tape, then snip to the seam allowance in the armholes and tape the thing together and try it on, well, I could have cut out a muslin, basted it together, and seen how things actually look in fabric. So, that's what I'm going to do from now on. I will buy fabric that I don't necessarily like but is being offered at rock bottom prices and use it for muslins. Thrifted sheets seem to be a popular source of muslin fabric, so I'll stop by goodwill and see what I can find. In the meantime, I have some cotton broadcloth I got on sale at Joanns that I'll use, and I do have actual muslin fabric that I can use, too.
Knitting News
I'm almost done with Cate's sweater. I have the major pieces knitted. Now, I need to sew the sleeves into the armholes and knit the collar. I've been needing to do that for a week, but I haven't found time to sit and carefully attach the sleeves (sewing seams is not my strong point).
Thursday, August 30, 2012
Making some progress
Well, since I last posted, I made substantial progress on my sweater for Cate, having knit the better part of both sleeves. Unfortunately, I had to rip them out due to stitch insufficiency. That is to say, I was supposed to knit the sleeves, increasing every 5 rows, until I had 47 stitches and then knit even until the sleeves were 8 inches long and then decrease. Well, I got to 8 inches and I still hadn't made it to 47 stitches. I drove myself crazy trying to figure out how it happened. The easiest explanation would have been that my row gauge was off, and it may well have been a little bit off. However, I did the calculations and found that you actually can't increase that many stitches in 8 inches at the row gauge stated in the pattern if you follow the pattern and increase every 5 rows. However, there are no errata for this pattern and nobody on Ravelry who has knit this pattern has mentioned this issue. There are lots of complaints about how the designer didn't tell you to handle knitting in pattern when you get to the sleeve cap decreases, but nothing about problems increasing to the right number of stitches. I checked and rechecked the math, though, and I stand by what I say.
So, I ripped back to the ribbing (*sob*) and started knitting the sleeves again, now increasing every 3 rows. So far, I have made little progress (I've knit exactly one row) but hopefully that will change once I get over being annoyed at the pattern.
So, I ripped back to the ribbing (*sob*) and started knitting the sleeves again, now increasing every 3 rows. So far, I have made little progress (I've knit exactly one row) but hopefully that will change once I get over being annoyed at the pattern.
Saturday, August 11, 2012
Over-inspired
Lately, I've been thinking about why I don't blog much anymore. I used to maintain 3 blogs and post to all at least twice a week. Now, I can barely even manage posting once every couple of weeks to one blog.
One issue, I think, is that for a long time I lived alone or with a relatively absentee roommate and/or a husband who lived in a different city during the week. So, when I got home from lab, I would need to express my thoughts, I did so on a blog. Now, I live with my husband and baby girl and Lorenzo the cat, so I end up expressing my thoughts to them. Or a Skype with my mom. Or, I walk a couple of blocks to a friend's house and talk to her while our kids play. So, I don't need a blog just to have someone to talk to.
For this blog in particular, the other major problem is that I just don't craft as much as I used to. This puzzles me, because I still love to knit/crochet/embroider/sew/cut/paste/etc. In the past (when I mostly lived alone) I would spend some time every night knitting and I sewed on the weekends when I had a chance. Actually, I knit just about everywhere--on the bus going to lab, during lab meetings, during seminars, while hanging out with friends, while watching TV. Now, I don't take a bus anywhere, nor do I participate in any lab meetings or seminars and I watch very little TV. So, I guess I've mostly eliminated the times and places I used to knit.
Still, you would think that, what with being a SAHM, I might find some time to craft. I mean, Cate's in bed by 8pm. That would seem to indicate I could squeeze in some knitting or sewing time before bed. So, what do I do instead?
I read blogs.
For real. One of the biggest reasons I don't blog or craft anymore is that I spend too much time reading other people's blogs. My reasoning for reading so many blogs is that I find them inspiring. They fill me with all sorts of ideas. However, I am never actually acting on these ideas, I'm just, you know, having them. And having so many of them, I don't know which one to act on first. The result is that I am rather over-inspired and under-ambitious at this point.
So, I think I need to re-evaluate which blogs I read and why and then seriously curtail my blog reading. I'm reading craft blogs, sewing blogs, knitting blogs, science blogs, mommy blogs, and genealogy blogs. That is just too, too many.
Just cutting back my blog reading isn't going to do much, however, unless I actually work on setting aside time specifically to craft. In the evenings, I'm pretty much fried so, perhaps I should [shudder] get up early?
Wednesday, July 04, 2012
It's not you, it's me
Dear Sorbetto,
I think the time has come for us to part ways. Do not think of this as goodbye, but merely so long for now. You are lovely with your little pleat detail and lack of facings, but I have come to realize that what I really want is a fitted shirt. I have been trying to make you into something you are not and that's not good for either of us. So, I bid you adieu. Perhaps we'll meet again one day.
Hugs and Kisses,
Elisabeth
Saturday, June 02, 2012
Wounded, but alive
So, as many people know, there was a sewing meet-up in San Francisco a few weeks ago put together by Karen of Did You Make That and Beth of SunnyGal Studio (you can read more about that here, here, here, and here). It was wonderful and I got all invigorated about blogging and it was my intention--really and truly--to blog about the event and more about crafting and life, the universe and everything. Two things prevented me from accomplishing my goal (well three, really, if you count the normal life stuff). One was that I teach catechism at my church and the kids I work with were going to receive first communion. If you've done church work, then you know that there's a lot of work that goes into the seemingly simple act of a special church service. The second was that I went under the knife about a week ago and needed to get ready for that, have it done, and then recover.
The surgery was to remove a ginormous uterine fibroid (non-cancerous). By ginormous, I mean about the size of a grapefruit. In comparison, a woman's uterus is about the size of a pear. The next time you go to the market, look at a grapefruit and a pear to see the difference in size. So, yes, the fibroid needed to go. The surgery was something like a C-section but instead of a cute baby, you get a fibroid at the end. Fortunately, they could go in through the same incision point as my C-section and this has made the healing easier. Still, I was laid up at the hospital and then at home. This might sound like a perfect blogging situation, but my in-laws have been here helping with Cate for the last week and a half and I thought it would be sort of rude to not be social when I was awake. My in-laws are gone now, so I don't have to be social with them, but since we are now lacking their help I won't be able to spend as much time laying around.
Bottom line: not much knitting, sewing, or blogging to speak of. Hopefully, I can change that soon.
 |
| Fig. 1. Fibroid vs. Uterus |
 |
| Fig. 2. Saints |
Bottom line: not much knitting, sewing, or blogging to speak of. Hopefully, I can change that soon.
Saturday, May 05, 2012
Dart Difficulty
When last we spoke re: Sorbetto I had made a boat-load of adjustments and adjusted the dart height on my muslin. After that, I took it totally apart and transferred the new dart position and the sloped shoulders adjustment to my paper pattern which is now made out of Swedish Tracing Paper (love that stuff!). Then, I made a new muslin in quilting cotton with the thought that if it came out okay, I would bind the neck and armholes and add it to my wardrobe.
 |
| Fig. 1. A boat-load of adjustments |
Unfortunately, there doesn't seem to be a lot of information out there about how to change 1 large dart into two smaller darts that are close together and in the same region. There's information about moving darts around but this was a little bit different. I eventually decided to measure the distance between the two legs, divide that number by 2, and draw two new darts that were more diagonal than horizontal to the side seam. Then, I transferred the markings to the muslin and sewed it all up again and...
...there were still little bubbles at the ends of the darts.
At this point, I put the project in time out. I only had a day or two until I was leaving for Iowa for Cate's baptism and didn't have time to mess with a misbehaving shirt. Since then, I've thought about it some more and I think part of the issue may be the fabric as well. I didn't notice the bubbles on my first muslin which was made from cheap broadcloth. That fabric had a lot of drape compared to the quilting cotton of the second muslin. I do still think that taking up so much fabric in such a short dart is going to give me problems, but they'd be less noticeable in a fabric with more drape.
 |
| Fig. 2. A diagonal dart near the hem will be longer than a horizontal dart and might be better suited to such a large dart. |
So, I'm still going to have to fix the dart problem. I've been thinking about how I should do it. One way is to keep working on making the 2 parallel bust darts. I was also thinking that if I did a long diagonal dart from closer to the hemline, then I might be able to get away with one dart. I'm not going to let my difficulties with this project get the better of me, though. I'm going to have a perfect-fitting top if it kills me!
And then I'm going to make about ten different versions of this shirt because I'm not going through all of this for one measly shirt!
Tuesday, April 03, 2012
No wonder nothing fits
 |
| Fig. 1. "Hi, I'll take that in a size 12 with a FBA, swayback adjustment, and sloped shoulders adjustment, please." |
 |
| Fig. 2. This is exactly what my personal croquis will look like. Also, I have a bridge I want to sell you.... |
Because of these fit issues, I think I'm on the right track in making my own clothes. In the past, I've shied away from it because I didn't know how to alter patterns to fit. Also, there's always the chance that I could spend huge amounts of time (and money, sewing your own clothes isn't necessarily the cheapest option) making something only to find that the style doesn't flatter my body in any way. For this reason, I think I'm going to make a croquis, although I'm not certain I have enough image manipulation skills to really use one effectively. We shall see.
Friday, March 30, 2012
So, I thought I might update you on making fit alterations to the Sorbetto pattern seeing as it's been a month since I decided to sew the pattern.
I received Fit for Real People as a Christmas present from my Darling Husband, so I first read everything except the details of each of the adjustments. There's a lot of good information in there about how patterns are drafted by the major sewing companies, ease, etc. That is all really helpful as background information although you can find much of that on the 'net these days. The book really shines in the chapters focusing on diagnosing fit problems and making the proper adjustments. The problem diagnosis is really invaluable. (Okay, so there are wrinkles leading away from the armscye but what does that mean?)
In the Palmer-Plestch method, you do tissue-fitting, that is, you pin together tissue pattern pieces and see what the problems are and then make adjustments to the tissue. Sorbetto does not come as a tissue pattern, rather it is a free, downloadable pdf that you print out on regular 8.5 x 11 paper and tape together. Therefore, I first needed to trace the pattern onto tissue.
Actually, first, I needed to determine what size to trace. P-P recommends using the upper bust measurement to determine your size which I did even though it seemed like pure folly to trace out a size 8 when I know I wear a 12 or 14 in RTW. But hey, they're the fit experts, so I traced out the 8 and did the tissue-fitting.
As a result of that fitting, I made the following adjustments:
I should have done the FBA a little differently. I used the standard method, but that made the armhole really wonky. I then futzed with the armhole for quite some time trying to get it to fit right. This might have been avoided if I had noticed this sentence under the heading The "Y" Bust Dart Alteration, "Use this technique for a full bust alteration when more than 1 1/2' is needed to bring the center front of the pattern to your center front." Live and learn.
Anyway, I made the alterations to the tissue, tried on the tissue again, then traced it onto a clean piece of tissue because the original had just about had it. Then, I did a muslin.
Now, the P-P method does not have you do a muslin. They have you tissue-fit and then "fit as you sew," meaning that you cut your garment out of the (potentially expensive) fashion fabric, pin it together, fine-tune the adjustments, and then sew. Well. This seemed a little too cavalier for me. I mean, I realize that, from their perspective, if you did the tissue-fitting properly, there shouldn't be too much for you to have to fix at this stage. But, seeing as how this was the first time I'd done most of these adjustments, I wasn't at all sure I had done the tissue-fitting properly. So, I used some inexpensive cotton broadcloth to make a muslin that I then pinned together and tried on.*
Right away, I could see there were some issues. One was that the bust darts were a little too low and weren't pointing at my apex. Frankly, considering the HUGE FBA I did, I was amazed that they were as close as they were. But, close wasn't going to cut it. I mean, why go through all of this trouble if you are just going to settle for good enough? So, I used a marker to mark my apex, unpinned the darts and redid them so they pointed to the apex.
The next issue was that there was too much ease in the waist and hips. Now, as you recall, I traced out a size that would have been far too small in the store, so I was a little surprised to see that I had too much room in the waist and hips. However, as a result of the FBA, I had increased the width of the front by 5 inches and the broad back adjustment had increased the width of the back by 1 inch. So, I could see how that might have made things a little too roomy. I pinched out the excess and pinned the seam back together.
At that point, everything looked okay, so I sewed the shoulders and the side seams and tried it on. The result was pretty darn good. There were some diagonal wrinkles coming from the armscye heading toward the shoulder, which I determined were due to sloping shoulders. I pinched out the excess in the shoulder and the wrinkles disappeared. The hem was lower than I liked, perhaps I'm short-waisted? That wasn't a problem because I just pinned the hem up higher. The underarm is still a little wonky, but when you make the sloped shoulder adjustment on the flat pattern, you alter the underarm, too, so maybe that will take care of the issue?
And that's where it currently stands. I wrote everything down and left the muslin to hang in my closet for the last week. I need to transfer the new adjustments to the flat pattern and then I might try a "wearable muslin" in a fabric I don't care that much about. If the fit is good, I'll finish the neckline and armholes with bias-tape (which is what the pattern calls for) and sew the hem!
One of the best things about the Sorbetto pattern is that--minus the pleat--it's pretty much as simple as you can get with a bodice pattern. Therefore, when I'm done with this, I'll essentially have a bodice block/sloper. So, once I have everything exactly right, I'll remove the seam allowances and the pleat and copy the pattern onto oak tag or posterboard or some other stiff, papery product and keep it forever and ever, or until I lose that 30 lbs I've gained since high school (so, really, forever and ever). I think a sloper usually has a jewel neckline and the Sorbetto has a scoop neckline but that's not a huge deal.
I'm hoping that all of this effort will also pay off when I make up the Violet pattern. By comparing the unaltered pattern to my sloper, I will hopefully be able to see at least some of the adjustments I need to make to the pattern and can start a little bit ahead of the game.
*The Sorbetto has a pleat down the front which I sewed down right away so that it wouldn't be a factor during the fitting. I might leave it out for the next fitting because it's mostly a hassle at this stage.
 |
| Fig. 1 These are the best-fitting 80s clothes I've seen in a couple decades. |
 |
| Fig. 2. Fitting would be so much easier if I had one of these. |
Actually, first, I needed to determine what size to trace. P-P recommends using the upper bust measurement to determine your size which I did even though it seemed like pure folly to trace out a size 8 when I know I wear a 12 or 14 in RTW. But hey, they're the fit experts, so I traced out the 8 and did the tissue-fitting.
As a result of that fitting, I made the following adjustments:
- Broad Back
- Full Bust
- Swayback
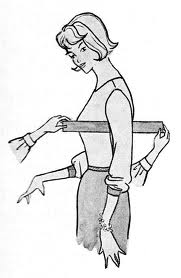 |
| Fig. 3. Fitting would also be easier with an extra pair of hands. |
Anyway, I made the alterations to the tissue, tried on the tissue again, then traced it onto a clean piece of tissue because the original had just about had it. Then, I did a muslin.
Now, the P-P method does not have you do a muslin. They have you tissue-fit and then "fit as you sew," meaning that you cut your garment out of the (potentially expensive) fashion fabric, pin it together, fine-tune the adjustments, and then sew. Well. This seemed a little too cavalier for me. I mean, I realize that, from their perspective, if you did the tissue-fitting properly, there shouldn't be too much for you to have to fix at this stage. But, seeing as how this was the first time I'd done most of these adjustments, I wasn't at all sure I had done the tissue-fitting properly. So, I used some inexpensive cotton broadcloth to make a muslin that I then pinned together and tried on.*
Right away, I could see there were some issues. One was that the bust darts were a little too low and weren't pointing at my apex. Frankly, considering the HUGE FBA I did, I was amazed that they were as close as they were. But, close wasn't going to cut it. I mean, why go through all of this trouble if you are just going to settle for good enough? So, I used a marker to mark my apex, unpinned the darts and redid them so they pointed to the apex.
 |
| Fig. 4. Artist's rendition of the fit in the waist and hips in my muslin. |
At that point, everything looked okay, so I sewed the shoulders and the side seams and tried it on. The result was pretty darn good. There were some diagonal wrinkles coming from the armscye heading toward the shoulder, which I determined were due to sloping shoulders. I pinched out the excess in the shoulder and the wrinkles disappeared. The hem was lower than I liked, perhaps I'm short-waisted? That wasn't a problem because I just pinned the hem up higher. The underarm is still a little wonky, but when you make the sloped shoulder adjustment on the flat pattern, you alter the underarm, too, so maybe that will take care of the issue?
And that's where it currently stands. I wrote everything down and left the muslin to hang in my closet for the last week. I need to transfer the new adjustments to the flat pattern and then I might try a "wearable muslin" in a fabric I don't care that much about. If the fit is good, I'll finish the neckline and armholes with bias-tape (which is what the pattern calls for) and sew the hem!
One of the best things about the Sorbetto pattern is that--minus the pleat--it's pretty much as simple as you can get with a bodice pattern. Therefore, when I'm done with this, I'll essentially have a bodice block/sloper. So, once I have everything exactly right, I'll remove the seam allowances and the pleat and copy the pattern onto oak tag or posterboard or some other stiff, papery product and keep it forever and ever, or until I lose that 30 lbs I've gained since high school (so, really, forever and ever). I think a sloper usually has a jewel neckline and the Sorbetto has a scoop neckline but that's not a huge deal.
I'm hoping that all of this effort will also pay off when I make up the Violet pattern. By comparing the unaltered pattern to my sloper, I will hopefully be able to see at least some of the adjustments I need to make to the pattern and can start a little bit ahead of the game.
*The Sorbetto has a pleat down the front which I sewed down right away so that it wouldn't be a factor during the fitting. I might leave it out for the next fitting because it's mostly a hassle at this stage.
Tuesday, February 21, 2012
Operation Sew Practical
One of my sewing goals this year is to sew practical items, which is just a little odd because I haven't sewn much of anything--practical or not--for quite some time.
But.
 |
| Fig.1. Not practical. |
So, it's my mission to sew some practical things this year. Things that I would actually use or wear right now and can survive close proximity to an infant. However, practical doesn't necessarily mean boring or unattractive. There are many lovely machine wash and dry fabrics out there. And there are many lovely patterns for things other than dresses.
 | |
| Fig. 2. Determined to show everyone my bra |
 |
| Fig. 3. What would you call this neckline? |
The other solution is to wear shirts made of woven material. Here is where we run into big (literally) problems. Ready to wear shirts are not designed for women with larger than average busts. I wear a DD or E cup, depending on the bra. Therefore, if I want to buy a shirt that fits over my chest it either needs to be baggy in design or a size or two larger than what I need to buy to fit the rest of my torso. Neither of these options is particularly flattering on me. I can make do by buying a button down shirt that I wear a cami under and only button below my chest but that gets really old (also, what is with most cami-shirts coming with that damn shelf bra in them? I always have to cut that stupid thing out).
So, if I want to wear a fitted or semi-fitted top made out of a woven material, the best solution is to sew it myself. This is still a little complicated because I will have to alter the pattern because patterns are usually drafted for a B cup, but it's better than buying a shirt I know does not fit me properly.
I am going to start with the Sorbetto, a free pattern from Colette. You may recall I was trying to modify this to wear it as a maternity top and never managed to finish it. I still love the original pattern and would like to make one. A sleeveless top is not exactly the most practical thing at this time of year, even in Northern California, but it's a very basic top pattern consisting of two pattern pieces and no closures, making a good top to start out with when learning to make a full-bust adjustment. And, I can still wear it this time of year with a cardigan. Also, everyone and their dog has made this pattern so there is a lot of inspiration and information out there. There are several ways to add embellishments or modify the pattern, including adding a short sleeve.
There are several other shirt patterns I'm looking at, too, but I think I'll concentrate on making a couple versions of Sorbetto for now and see how it goes. I'm setting the goal of having the pattern traced, cut out, and full-bust-adjusted by this time next week. That seems reasonable even with a little baby in the house, right?
Sunday, February 19, 2012
2012 Goals
It's ridiculously optimistic to talk about sewing and knitting plans when there's a 9 week old baby in the house. And yet, if I don't start dreaming and planning, I'll never make anything at all. Still, it's probably better for me to think more about overall goals rather than sit down and make a list of patterns I want to knit and sew. So, here are my sewing and knitting goals for the year, in no particular order.
Knitting
Knitting
- Get Christmas gifts done by October
- Limit Christmas knitting to my mom, MIL, husband, and daughter
- Knit something for myself besides dishcloths!
- Use yarn from my stash
- Sew practical items
- Make well-fitting clothes
- Improve finishing details on clothes
- Use fabric from my stash
- Sew with patterns I already have (and have never made) rather than constantly buying new ones!
Subscribe to:
Posts (Atom)