Showing posts with label Colette. Show all posts

Saturday, June 06, 2015

Colette Pastille: WTF

When last we spoke about my Pastille dress, I was doing a mommy-tummy adjustment on the skirt.  The plan was that if that went okay, I would then make one final muslin of the bodice that incorporated all of the changes, sew them together and make one last check for fit.

I made this skirt and tried it without the bodice:
The old, stand-on-a-stool-so-you-can-see-your-skirt-in-the-
bathroom-mirror trick.  I really need a full-length mirror
in the living room where my sewing machine lives.
As you can see, it looks pretty good.  The side seam looks straight although it might be a tiny bit forward right at the waist.

So, I attached bodice muslin 3 to it to see how it looked:

Please excuse whatever was on the bathroom mirror.
Toothpaste maybe?  I dunno, I live with a 3 year old, it
could be anything.
Also not bad.  Actually, pretty good!

At this point, I got really excited and made up the bodice in the same red fabric as the skirt and sewed them together.

Disaster.

First, I thought I would use bias tape for the neckline instead of a facing because facings annoy me and that was a hot mess that I won't be repeating.  But, I figured it was fine, because I didn't really care about this fabric so I could throw it all away if I wanted.  But then, I looked in the mirror and I got so disgusted, I couldn't even take a picture.  The bodice felt funny.  Maybe from the mess at the neckline?  I dunno.  Worse there were diagonal pull lines in the front skirt.  Ugh!

I tried it on again today and this time I took pictures in order to share the horror:
Ignore my hair, I hadn't gotten ready for the day, yet.

I spent a lot of time trying to stand in the mirror in a way
that most obscures the mess on the floor behind me.


It looked like maybe the bodice was pulling the skirt up in the front so I let out the bodice seam in the front.  I overcast the seam allowances together so it's essentially got a 1/4" seam at the waistline:


Better, but I don't get why the bodice is suddenly too short.  I need to take it apart and compare it to the previous bodice muslin and the pattern piece.  At any rate, it looks like I need to add half and inch to the front bodice and front skirt.

There's still some pooling and wrinkling of fabric in the upper back of the bodice while the lower back is now looking a bit too tight (maybe?).  I need to pinch out the excess at the top and maybe fix the swayback adjustment, I think.


Whatever it needs, it's going into time-out for awhile to think about what it's done while I work on the Outfit Along (Bad, bad, bad Pastille!  Mommy is not happy with you!).  I'll pull it out once I've finished the dress for the Outfit Along (so, the end of July?).

Monday, May 18, 2015

Colette Pastille: Skirt muslin #2

So, when last we saw the Pastille muslin, I had finished bodice #3 and I was feeling pretty good about it having cut a smaller size in the waist and completed an FBA and a swayback adjustment.  The next step was to make a second muslin of the skirt.*  For this iteration, I had cut a smaller size and done a swayback adjustment.

Bathroom photos are the worst
What you can't really see is that it's still too baggy at the side seams in between the waist and hips.


Please ignore the potty chair in the background

 On the other hand, I have a textbook case of "prominent abdomen"**.


Here, I've taken in the sides of the skirt going from the waist to the hip and let it out a bit at my upper thighs.  That has helped with the prominent abdomen but it's still not quite right.

Next step is to try the pot-belly alteration for pencil skirts by Maria Denmark found on the By Hand London blog here.  Right after I took this picture, I drew a line just under my post-baby belly that curved up to the hipline, like on the tutorial.  Then, I cut along that line, let the fabric fall in front and pinned Swedish tracing paper to the skirt across the gap so that I could preserve the size of the gap when I took the skirt off.

Cutting line

Now, I need to transfer that slash and spread to the paper pattern, along with the seamline adjustments and cut a new muslin for the skirt.  Onward to skirt muslin #3!


*The first bodice muslin was so awful that I didn't bother making the skirt at the time, I just went straight to making a second bodice muslin.

**Or as I like to call it, post-baby belly.

Thursday, May 14, 2015

Colette Pastille: Bodice Muslin #3

Crappy bathroom mirror photo at 12am
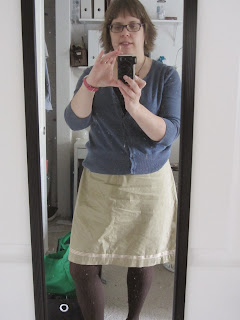
Not my best look
My 2nd Pastille bodice muslin was baggy at the waist and just a little too tight in the bust.  For this muslin, I went a size smaller for the waist and did a very small FBA.  This was very successful and I now feel the front of the bodice looks and feels like a sheath dress.  I probably could have added another 1/8" to the FBA to give me a tiny bit more ease in the bust.  Because it's so hard to find ready to wear fitted tops that actually do fit me right, I mostly wear knit fabrics.  So, I am not used to the feel of a fitted garment with no "give" to the fabric and as a result, the bust feels a little bit tight.  There is no pulling of the fabric across the bust, so the fit looks very good and I don't think I'm going to change it.

Another crappy bathroom photo.  I can see some wrinkling
here, but I think that might go away with the weight of the skirt.
After sewing the muslin and trying it on, I saw the back bodice dipped way down past my waist in the middle but not the sides.  So, I unpicked the zipper and did a swayback adjustment, removing about an inch from the middle tapering to nothing at the sides.  Yes, I do baste my zipper into my muslin.  Since I'm fitting the garment on myself, it is the only way to close the back properly so that I can check the fit.  I read a tip once that said to put the opening in the front of your garment for your muslin because that makes it easier to fit things on yourself without sewing in zippers.  I can see how that would help with the back, but what if you need to make adjustments to the front?  Won't having an opening there screw with how the front fits?  Anyway, I'm finding that basting an invisible zipper into the bodice takes almost no time at all, now that I've done it several times in a row.  Funny how that works.

I took some photos in the mirror so that I could try to see how it all looks, especially the back which is difficult to see otherwise.  I do see some wrinkling, but that goes away if I pull down on the bodice,  leading me to think that the weight of the skirt may take care of that once the skirt is attached. So, I'm moving on to skirt muslin #2 before trying to make any more changes to the bodice.  I'm also worried I may end up overfitting the bodice and since it feels pretty good when I have it on, I'm not sure I want to make any more changes!

Friday, May 01, 2015

Colete Pastille Muslin #2: So Much Better

I'm really glad I decided to cut a second muslin than attempt to fix my first sad muslin.  I did my measurements, made my changes to the paper pattern, cut and sewed the bodice and lo and behold and possibly verily, the fit was so much better it was hard to believe it was the same pattern!

Emboldened, I embarked on the skirt portion where I immediately ran into trouble.  Even armed with measurements, it was difficult to decide which size to cut.  I think this was partially a function of inexperience and not knowing how much ease I actually want in a garment.  But, I do think the pattern drafting is not totally blameless.  The ease in the pattern is 1.5 inches for the bust, 1 inch for the waist, and a bewildering 5 inches for the hip.  However, this is supposed to be a fitted sheath dress and in the book, Sarai says that "for a very close fitting garment, this might be 2" in the bust, 1/2" in the waist and 2" at the hips" (1).  And, looking at the picture of the model, I would guess that's about how much ease there is in the version of the dress she is wearing.

For myself, I compared my measurements with the finished garment measurements and then made sure I had the amount of ease the pattern called for.  As a result, I have an enormous skirt which I have taken in on the sides a lot.  A lot, a lot.  The middle back of the skirt was a hot mess until I did a swayback adjustment which made things somewhat better.  I'm tempted to keep messing with the skirt part of the muslin, but knowing how much better everything became for the bodice just from cutting a smaller size, I think I will recut the skirt in a smaller size and see how that looks before trying to make more changes.

The bodice still isn't perfect.  While the smaller size is definitely better, it's a little too tight in the bust (but not elsewhere), so I think I will need to do a very small full bust adjustment to get the fit right there.  I also still need to shave a little off of the side seams at the waist.  Finally, attaching the skirt made the back middle of the bodice droop (but not the sides) leading me to think I may need to do a swayback adjustment, but I might wait on that until I try a smaller size skirt to see if that makes a difference in the amount of length I want to remove in the swayback adjustment.

(1) Colette Sewing Handbook, p. 64

Saturday, April 25, 2015

Colette Pastille First Muslin


Mmmm....pastilles.
[source]
Now that we are in spring, I have been feeling more inclined to sew.  Fall and winter are for knitting, spring and summer are for sewing.  I made a denim Miette (from Tilly and the Buttons; more on that later) and now I am working on the Pastille dress from the Colette Sewing Handbook*.  I just finished my first muslin and it is the epitome of why you should start with a muslin:  it looks terrible.  Baggy, the waistline is wrong, I may have cut out the wrong size bodice and the hips look funky.  It is so fugly, I was tempted to abandon the idea of making the Pastille altogether.  Half an hour later, though, I remembered why I started sewing this dress in the first place, even though I really have little need for a sheath dress:  I need to practice sewing.

I'm a firm believer in developing new skills and common sense says that the only way to get any better at them is to practice.  With every other skill I've cultivated, I have understood that I will need to practice before I will be any good at it, but with sewing, however, common sense seems to fly out the window.  I want to be good at it right now and if I'm not, I don't want to do it.  I've been trying to figure out why I'm so resistant to the idea that I will need to make an unspecified and probably rather large number of terrible garments before I will be able to make lovely ones and I think I've come up with a couple of reasons.

1.  Fabric isn't cheap and making a garment that goes straight into the trash feels like throwing away money.  I know some people obtain cheap fabric by buying old sheets or fabric at flea markets, yard sales, and second hand stores and all I can think is:  those people must have more time than I do.  I have yet to find old sheets at the goodwill near me, much less fabric yardage and so would need to visit several of these stores many times in order to get the cheap fabric and frankly, it's hard enough for me to find time to do laundry frequently enough to keep my family of three people in clean clothes.

2.  The only way to know if I have been successful in my sewing is to try the garment on.  This involves a whole lot of time looking at myself wearing something awful.  It's like going jeans shopping with the added downer that it is my fault the garment doesn't fit.  A dress form would likely help, but I can't afford one at the moment and I live in a very small apartment.  I think I might have to throw out the vacuum cleaner in order to have space in the closet for a dress form and since we have wall-to-wall carpeting and a toddler, that would not be a good idea.  Leaving a dress form out all the time is not an option, even if I could find a spot where we weren't tripping over it (see also:  destructive habits of a three year old).


If only I had a set of disembodied
hands to help me with fitting.
So, the only way to get better at sewing is to spend money and put on clothes that make me look like I'm wearing a sack.  Oh, and become a contortionist in order to do things like "pinch out fullness" on my muslin while I'm wearing it (I'm looking at you, swayback adjustment).  Recently, I've decided that I'm just going to have to suck it up, swallow my pride, and just make a bunch of ugly, ill-fitting garments so that I can one day make beautiful, well-fitting clothes that I love.  To that end, I decided to start working my way through the patterns I already own using the fabric I already own.  I'm fairly good at making an A-line skirt and a Renfrew-style t-shirt, so now it's time to work on woven dresses and tops.  Once I feel pretty confident about those, I might even start working on making that most dreaded of all garments, the Waterloo of home sewists everywhere:  pants.**

Before tracing the pattern for the Pastille dress, I took my measurements, added a little ease, and compared the end result to the finished measurements of the dress and chose what size(s) to trace.  Based on measurements, it seemed like I needed one size for the upper body and then grade out to a larger size for the waist.  Trying on the muslin, my waist looks rather baggy and sad, so clearly I added too much to the waist.  Also, the front waistline of the bodice was about an inch above my actual natural waist and the back waistline appeared to be nearly two inches below my natural waist.  After doing some Google searches on the Pastille dress, I found that many people have also had too much length in the back of their muslin and one or two have also had the front of the bodice be too short at the same time.

So, my current plan is to throw out my first muslin and start the second one by first tracing a smaller size bodice.  Then, I'm going to actually measure my torso from my shoulder to my waistline going through my bust apex and measure paper pattern at the same point (something I should have done in the beginning) and add length to the bodice front pattern piece.  For the back, I'm going to attempt to get my husband to measure my back length.*** Then, I'll again measure the paper pattern piece and shorten it accordingly.  For now, I'm not going to mess with the skirt, just fit the bodice. Once I have a nice fitting bodice, I'll work on the skirt which I anticipate will need a swayback adjustment.

Onward!

*Funny story:  my copy is signed twice!  I bought it from the Colette website so it came to me signed and then I got a chance to meet Sarai at a book signing/meetup in Oakland and she signed it for me in person

**And by pants I mean trousers, not underwear, although I've got a bunch of old t-shirts sitting in a pile, waiting for me to make underwear out of them

**As a scientist, you would think something as simple as taking a tape measure and determining the length of an object would be relatively easy for him, but as soon as you make that object a living thing, he gets confused (to be fair, he's a physicist, not a biologist, so living things confuse him--think of him as a cross between Sheldon and Leonard from Big Bang Theory).

Monday, November 04, 2013

Ginger #2


 I finished my second Ginger skirt.

Pattern:  Ginger from Colette
Fabric:  Cotton stretch sateen from Joann's
Notions:  1 invisible zipper and a grossgrain ribbon for trim at the bottom
Modifications:  Used a contour waistband pattern piece I made for my first Ginger, raised the hem a few inches, and added some ribbon as trim.

Actually, I finished it quite some time ago.  I was going to add some ribbon to the waistband and it's been hanging in my closet with the ribbon pinned to it.  Sunday morning, I was desperate for some clean clothes so I pulled all of the pins out and put it on.  Perhaps I'll add the ribbon sometime in the future.

Part of the reason this skirt has been hanging in my closet without being either finished or worn is that it didn't fit right.  I gained weight in between making my first Ginger and the second and so the waistband was too tight to wear a little below my natural waist like I wanted, instead it sat at my waist.  And, because I raised the hem, it was too short when it was sitting at my natural waist.  So, it sat in my closet, waiting for me to either take out the hem and lengthen it or give it away.

My experience with this skirt is one of the things that prompted me to start exercising and start eating better. It wasn't a long time between the time I finished my first Ginger and my second and yet I had still gained enough weight in that time for the skirt to not fit right (the 1st Ginger was longer so even though it sat higher on my waist that I would have liked, it didn't seem too short).  I've been steadily gaining around 5 lbs a year for the past 10 years.  This is not something I wanted to continue!  So, I've been eating twice as many fruits and veggies as I had been, drinking three times as much water (seriously, I was terribly dehydrated before!), and watching my portion sizes.  Now this skirt fits like I want it to!

Obligatory self-portrait in the mirror
Question:  does modeling your finished projects ever get any easier, or does it always feel awkward?  I always feel like a bit of a dork having my husband take random photos of me.  I'm not a center of attention kind of person.  I've heard having a tripod and a remote helps but I only have a point and shoot camera.  I can get a tripod for it, but not a remote, and the timer gets old real fast.  Any suggestions?

Saturday, July 06, 2013

Confession

This is a summer of almost non-stop travel.  Iowa June 11-25, Boston July 11-23, Sunday school teacher training in Napa Aug. 11-18.  It's a total coincidence all of the departure dates are the 11th.  I actually didn't even notice it until I typed it out just now.

So, what with one thing and another and this and that and the other thing...I fell off the wagon.

Forgive me Father, for I have sinned.  I bought cheap clothes.

I have been trying to be more environmentally and ethically conscious when buying clothes.  But, well, we were leaving for Iowa in a couple of days and it gets beastly hot and humid there in the summer (95+ degrees F with 70-90% humidity) and I didn't have any shorts and I had very few t-shirts.  I had looked and looked and tried on shorts to no avail--nothing fit and time was running out.  Sooooo, I went to Kohl's and bought two pairs of Lee* jeans.  Since none of the capris and shorts were of the same cut, I bought the full length jeans and hacked one pair off at the knees for shorts and the other off a little below the knees for capris.  Aaaannd, since I was at Kohl's, I bought 2 t-shirts.  And a purse.

Then, while in Iowa, I went to Eddie Bauer and bought 1 t-shirt, 1 tank top, and 2 rather sheer blouses (looks like maybe made of a cotton voile) to wear over tank tops.  I feel slightly better about this because 1) I am still wearing Eddie Bauer clothes I bought 5 years ago and 2) the clothes were made in China where the factory conditions are much better than, say, Bangladesh (although, it should be said that in many factories the workers are still not paid a fair wage and the factories have no respect for the environment).

Then, today, I bought a pair of Dansko sandals that were regretably made in China.  Have you tried to find shoes that aren't made in China?  I'm having a hard time finding them in stores.  I have found some to order online but I have such a hard time finding comfortable shoes to begin with that I prefer not to order shoes online for fear I will end up in an endless cycle of ordering and returning shoes.

They say that you find out how strong your convictions are when your back is against the wall.  I guess mine are not as strong as I would like them to be regarding where my clothes/shoes are made.  I feel pretty good about trying to buy clothes/shoes that will last, though.  I have hopes of wearing my Dansko sandals for a number of years and having them repaired when necessary.  I am handwashing my lightweight shirts from EB because I think that will make the delicate fabric last longer.

I'm still working on making my own clothes, too.  It's just taking me much longer than I anticipated.  Last night, I finished another Renfrew t-shirt (this time made from a ribbed knit cotton/spandex blend from Joanns).  I have enough fabric for two more t-shirts and I'm hoping to make a simple Renfrew dress by extending the hemline.  And, I want to make another Ginger and a Miette (this would require some pattern grading, unfortunately, but it's so cute I'm willing to give it a try!).  I'd love to make a Cambie, too.  But, I fear it may take me all summer to get through that list (especially with all of the traveling planned).  Fortunately, I think I am set for the summer and the t-shirts and skirts should carry me through most of the fall and on into December (local climate being what it is).  So, I have time to continue to work on my wardrobe.  And, perhaps I need to revise my expectations and realize it's going to take awhile to put together an ethical wardrobe and that there's no point in beating myself up in the meantime.

*Lee classic fit jeans fit me.  I have tried others--all kinds of "curvy" fit jeans at Gap and many, many types of Levis (515, 529, I've tried them all).  They do not fit.  I hope one day I will be able to make my own jeans but until that blessed day, I have decided that I will be buying Lee jeans and not feel guilty about it.  I did try finding a pair 2nd hand, but I could not find any.  :(

Wednesday, May 29, 2013

Gingerly

This is the Colette Ginger which is an A-line skirt with a waistband and a back zip.  It's a pretty straightforward pattern, but I made a muslin anyway to check fit.  I'm glad I did because the waistband gaped at the top.  After pinching out the excess, I realized that what I needed was a contoured waistband.

Fig. 1:  My natural waist is ridiculously high
The Ginger waistband is similar to other waistbands that I've encountered in that it is pretty much rectangular when you sew the pieces together.  I think the idea is that since it's supposed to sit at your "natural waist" (that is, the narrowest point of your lower torso) the waistband doesn't need to be much wider on the bottom than on the top.  However, my natural waist is really high--maybe a couple of inches below my bust--so I never wear skirts and pants at my natural waist. 


So, I tend to wear my pants, skirts, etc. lower than my natural waist, but that area has a lot of curvature, so a mostly rectangular waistband is not going to fit me right.  However, if you take in the waistband at the seams quite a bit, but only at the top of the waistband, you end up with a really strange looking, trapezoidal pattern piece.  If you cut your waistband with those pieces and sew them together, you get what sort of look like mitered corners at the side seams (ask me how I know).  Enter the contour, or curved, waistband. 
Fig. 2  Rectangular vs.
Contour Waistband

Of course, the Ginger skirt doesn't come with a contour waistband, so I would need to draft the pattern pieces myself.  This was a little daunting considering I hadn't ever done it before, but since I was working with a muslin I figured I didn't have anything to lose.  I searched for a tutorial for drafting a, but only found written descriptions of what to do in a reply to a post on Pattern Review (and another method here).  I was surprised by the lack of information on this subject--I can't be the only woman with this sort of problem.  In any case, I was able to successfully draft pattern pieces for both the front and back waistband, and make a Ginger skirt in my fashion fabric (turquoise linen) which I love!  I've already worn it a couple of times, but haven't managed to get pictures yet.  Perhaps I should work on that tomorrow. 


Tuesday, September 25, 2012

Now what?

I've been thinking about my crafting priorities for the rest of the year.  While looking through A Verb for Keeping Warm's website, I came across a group endeavor called Seam Allowance.  The members pledge to work toward increasing the number of handmade items in their wardrobe to be at least 25% of the total.  Practically speaking, they are talking about being able to wear at least one handmade item every day (this includes accessories, such as scarves, jewelry, and headbands/hats/fascinators, etc.).  This seems like a very worthy goal and a good way to be a bit more thoughtful about your wardrobe and your creating. 

For instance, if you are hoping to wear one handmade item a day and you don't usually wear a lot of dresses (and don't want to), then your sewing goals should reflect that.  Sunni of A Fashionable Stitch has been talking about this issue as well.  You may really enjoy sewing dresses, but if you never wear them you might want to curb your enthusiasm a bit.  Likewise, you should think about sorts of clothes you wear everyday and if they are the kind of clothes you want to wear or are you looking for a change.  Then, you can plan your sewing/knitting/crocheting/weaving/jewelry-making appropriately.

Right after I had Cate, I really tried to dress thoughtfully most days.  I was (and still am) worried about "letting myself go."  It's so easy, after having a baby, to wear yoga pants and a t-shirt most days, just put your hair in a ponytail, and forget about make-up, but it seems to be difficult to break that habit.  So, I worked on wearing business (very) casual most days and tried to put on make-up everyday.  However, I let that slip somewhere along the line.  Maybe it was because as Cate became more aware of and involved in her surroundings, it was harder for me to find time to put myself together each day.  Whatever the reason, these days I throw on whatever's handy and rarely wear make-up.

I want to get back to being more thoughtful about my appearance.  I almost always feel better (happier, more self-confident, less self-conscious) when I feel I am dressed well.  I want to put on clothes that make me feel good, not just whatever is easiest (and still clean!).  This is going to take some thinking about what I would like to wear and what is practical to wear (since I spend quite a bit of time on the floor with Cate, or chasing after her, or having her suddenly start gnawing on my leg).

My Meringue skirt was a step in that direction.  I made it out of navy blue cotton sateen with no embellishments beyond the scalloped hem.  It's comfortable, practical, looks good, and, because it's fairly plain, it can be worn more than once a week.  It's a neutral color so it should go with most of the shirts I own.  It's lined (or rather, it soon will be) so that I can wear it with tights in the winter.  I need to finish up this Meringue, however.  I barely got it wearable in time for the launch party.  I did that by not lining it and choosing to ignore a few issues (like the puckering at the hem).  I still need to cut, sew, and attach the lining, fix the puckers, finish some seams and fix a couple of issues with the zipper.  I'm hoping to get that done by the end of the week.

But, what to work on after I finish the Meringue?
  • Meringue v2.0:  I should have done a swayback adj. for Meringue v1.0, so I'm going to try to do that in Mv2.0.  I'm also thinking about playing with some piping and using contrast fabric for the facings and attaching them to the outside.  I have a khaki cotton sateen similar to the navy I used for Mv1.0 and I was thinking of dark brown gingham for the facings.  That will make it different enough from Mv1.0, but still neutral/basic enough to wear with most things in my wardrobe.
  • Renfrew:  The weather in the bay area is such that I could probably spend most of the year wearing 3/4 sleeve shirts, but I don't often find 3/4 sleeve t-shirts that I like.  Therefore, I purchased the Renfrew pattern from Sewaholic which comes with three neckline styles and three sleeve styles.
  • A button-down shirt:  I'm trying to get away from wearing t-shirts all the time.  I don't want to get rid of them completely (which is why I want to make a Renfrew or three), but I would like to be able to wear a fitted button-down shirt once in a while.  Unfortunately, my bustline makes it difficult to find a RTW fitted button-down shirt that actually fits well.  Sewing to the rescue!  I'm not sure what pattern I'll use for this project.
  • Thurlow trousers:  Another Sewaholic pattern.  I would love to wear skirts every day, but, realistically, that's not practical at this time in my life.  However, I have a helluva time finding pants that fit properly.  Between having a curvy figure, large thighs, a super-long crotch depth, and a swayback, it's really a miracle I can find RTW pants that fit at all!  Fortunately, I have one pair of jeans that actually fits fairly well and since I know the rise/crotch-depth is right on these jeans, I'll measure them and use that measurement as a starting point for my muslin.  The pattern is geared toward pear-shaped women, and while I'm not exactly pear-shaped, I do have all of the issues the pattern is supposed to address.
So, that's my current sewing queue.  Next up:  my knitting queue!


Monday, September 24, 2012

Colette Party at Verb

Camnesia  (noun)  Forgetting you have your camera with you while at an event.  ex. I won't be showing pix of the Colette launch party because I had camnesia.

The Colette Launch Party at A Verb for Keeping Warm was wonderful!  I got to meet Sarai and have her sign my The Colette Sewing Handbook.  I had forgotten that I had bought my book from the Colette website and therefore it was already signed (which is why I bought it off the website to begin with).  So, it was amusing when Sarai opened the book to sign it and her signature was already there!  I asked her to sign it again which she was happy to do.  :)

Double-signed by Sarai

Sarai was really lovely.  I got to talk with her for a little while and I may or may not have gushed over her in a fangirl sort of way.  It's not often you get to meet a famous person that you have admire.  The party at Verb was just the right size for the space and ended up being intimate enough that not only was it possible to get Sarai to sign my book (again), but I also was able to talk to her a little bit about sewing and writing a book. I was even able to show her the scallop hem of my Meringue and ask her how to fix a small issue with it (OH YES I DID).

Sarai suggested clipping closer to the seam to get rid of that pucker.

I loved talking with bloggers and non-blogging sewists (I had a little discussion with a couple other stay-at-home-moms about the challenges of being a mom including trying to sew with baby brain + exhaustion and the frustration of your kids being more happy to see Daddy when he comes home than they seem to be to see you all day!).

This was really so much fun and that leads me to this point:  if you have an opportunity to attend an event like this (a blogger meet-up, a launch party, a book signing)--GO!  Seriously.  I have attended these sorts of events for science, knitting, and sewing and even if I don't know any of the people before getting there, I always have a wonderful time.  The reason, I think, is that it is an opportunity to be with "your people."  Seriously.  How often do you get to sit with a group of people and talk about your hobby and everyone understands 1) nearly everything you are saying and 2) your enthusiasm for it?  At the launch party, I was surrounded by people who love to sew (at every level of experience), enjoy Colette patterns.  People who actually recognize the garment I was and complimented me as only another sewist could.  People were asking each other about the garments they were wearing and what they had made recently and did they have any tips for making Clover?

I can't wait for the next blogger meet-up!

Saturday, September 22, 2012

No waistband

I'm not sure what is going on, but every time I try to add a waistband to Meringue, it throws off the fit.  So, I'm doing away with the waistband.  I really would like to have this skirt done by tonight and I'm starting to realize that part of my problem with sewing right now is perfectionism.  I could fuss with this skirt for eternity and never achieve perfection.  And therefore, never have a skirt.  Well, basta!  Enough!  I'm going to sew this skirt sans waistband and I will love it and wear it to death!

Friday, September 21, 2012

A change of plans

Previously, on e-beth knits:

In trying on the Meringue muslin:  the skirt had no ease, the waistband gaped, and there was fabric pooling above my butt.

The next day, I decided to try the muslin on again--this time with a pair of Assets on board and without the waistband.  I also tried the advice of Palmer-Pletsch and let out the front darts over my "full tummy" (or as I like to call it, "that part of my body that has not been the same since pregnancy").  At that point, it seemed like I had a ridiculous amount of extra fabric at the side seams.  So, I pinned it in at the sides, and compared it to the pattern.  Now it appeared I should cut a 12 at the waist, expanding to a 14 by the hips (I originally cut an 18).  I modified my paper pattern accordingly, took out the side seams of my muslin, drew the new seamline, and tried it on again.

It looked awesome (well, as awesome as a muslin can look)!  I'm not sure how to explain how I went from needing to add extra room to a size 18 muslin to taking in that same muslin several sizes.  I mean, I know letting out the darts and wearing shapewear helped, I just don't see how it could have helped that much.

I still think I want a waistband and I drafted one last night but then didn't have time to cut it out and try it on the muslin.  I'll do that tonight and then (fingers crossed!) I'll cut the fashion fabric as well.  I'm not sure I'll have much time on Sat. to sew which means I'll need to get as much as possible done tonight.  I can see myself wearing jeans and hemming my skirt at the Bay Area Sewists Meetup that's before the launch party, then putting on the skirt right before the launch.  :)  I don't think there's any way I'll get the lining put in by tomorrow afternoon, either, but I can add that afterward.

Wish me luck!

Thursday, September 20, 2012

Meringue (hold the lemon)

This weekend, the Colette trunk show is coming to a local fiber store, A Verb for Keeping Warm (Verb carries yarn, fiber for spinning, knitting, spinning, and weaving supplies, and fabric).  As soon as the date was announced, I knew that I wanted to make a garment from a Colette pattern to wear to the show/party, so I decided to make the first project in The Colette Sewing Handbook, Meringue.

Meringue is a scalloped hemmed, slightly A-line skirt.  There are two skirt pieces--the front and back--plus the facings, and a side invisible zip.  I am adding a waistband to the pattern because I think that will be more flattering for my figure type.  I am also lining the skirt so that I don't need to wear a slip.  The fashion fabric is a navy blue cotton stretch sateen from Joanns and the lining is a fuschia poly lining material.  I've decided that I will hem the lining to where the scallop-hem facings end because I don't want to deal with a scallop-hemmed lining.

I tried to do a tissue fitting Monday night and gave up in frustration, which was what prompted me to write the Tissue Fitting is Dead to Me post.  Next, I cut out the front and back in cheap broadcloth, sewed the darts and seamed the sides together.  Then, I needed to think about the waistband.  Colette has a tutorial for making a waistband for Meringue which involves slashing the pattern near the top, adding seam allowances to both pieces and then sewing the top piece as the waistband.  I like this idea, but I decided that I wanted the skirt to sit higher on my waist and I didn't want to show more leg.  So, I decided to try Gertie's method of making a waistband (tutorial here, but I used the method from her new book which is slightly different).  In her book, Gertie says that the waistband pattern can be used with any skirt type, so I thought it would work for my skirt.  I sewed the waistband and attached it to my skirt and tried on the skirt.

Several issues showed up right away:
  • The skirt had no ease.  I wanted it to be fairly fitted but this was a little over the top.  To add ease to the skirt, I think I'm going to make my seam allowances 3/8 inch instead of 5/8 inch.  That adds 1/2 inch to the body of each side of the skirt resulting in 1 inch of ease over all.  I think this will be plenty because the fabric has some stretch to it.
  • The waistband gaped.  This is likely due to my swayback.  I think this problem may be solved by using a curved waistband.  Therefore, I'm going to draft a waistband by closing the darts and tracing the top of each pattern piece, adding two inches in height, adding 5/8 seam allowance to all sides, and adding one inch in length to the front waistband piece so that I can make a tab.
  • Fabric pooling just above my butt.  This is also a swayback issue, I think, and will hopefully be solved by taking a wedge shaped tuck near my waist in the back.
So, I'm going to try drafting the waistband and trying it on my muslin.  I'll also take the tuck out of my muslin and transfer it to the paper pattern.  If all goes well, I should be able to start cutting my fashion fabric soon.  Cross your fingers for me, because the weekend is fast approaching!

Wednesday, August 31, 2011

Hold the phone--new patterns from Collette!


So, so excited to see the fall offerings from Collette which are now available for pre-order. I am particularly excited to see the pattern for the Jasmine blouse which has a simple shape that I think I can modify to be a maternity top! Woot! I think I'll be making the 2nd view (shown above) which has a simple tie in the front and not a bow (bows and ruffles in that area often make my bust look overwhelming, although maybe it would help balance out the big belly?).

I also like the Peony dress which will be going on the post-baby wishlist (more on that another time). The Clover cigarette pants (also shown in the image above) I am not so enamored with. Skin-tight pants do not look so good with my thunder-thighs. Would love for them to come out with a simple, straight-legged pant. That would be awesome.

------
Instead of saving the image straight off the website, I did a screen capture. Does that address copyright issues? I'm leery of taking the photo directly from the site, but I feel like if I do a screen capture, it's now my photo of their photo and therefore okay to show.